Journals

Photo Walk to Kofuku-ji

Kofuku-ji is both a landmark and a symbol of Nara. It used to be the family temple of the Fujiwara, the most powerful family clan during much of the Nara and Heian Periods. The temple originally is said to have contained almost 150 buildings in its premises, but only a few have survived, and most rebuilt over the years.

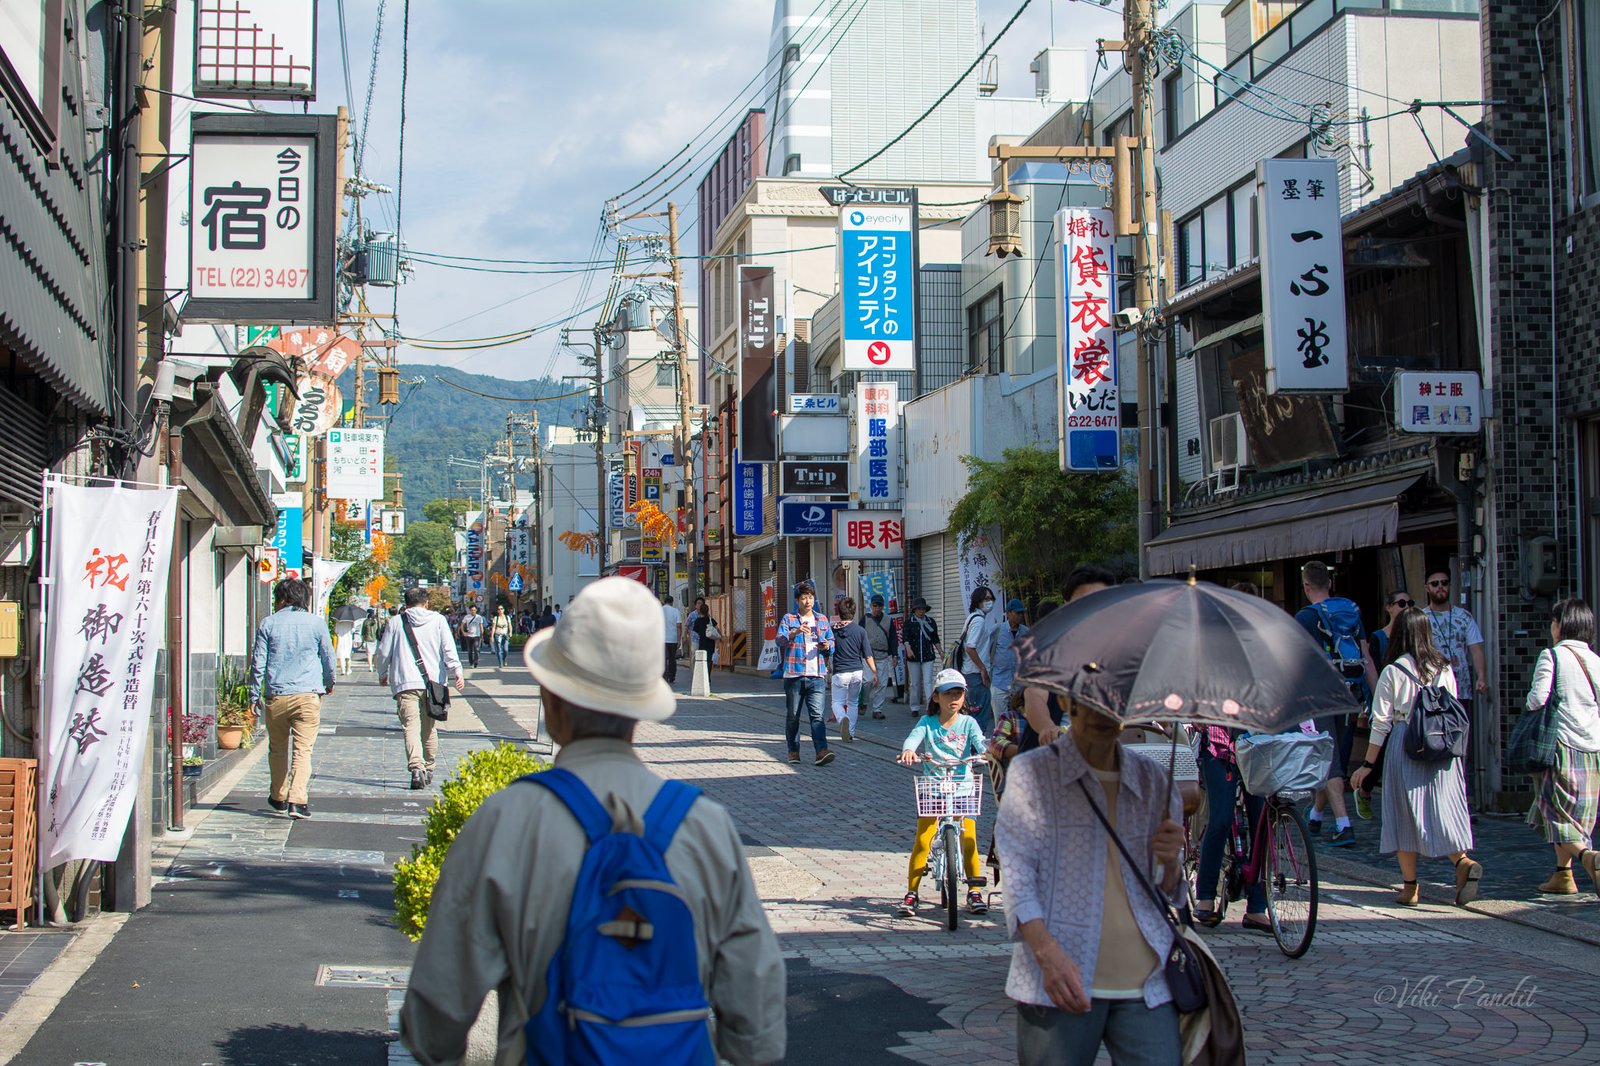
I had a quick breakfast at the Nara University cafeteria and head off to Kofuku-ji on foot using the narrow lanes. The route I love to go to Kofuku-ji is via the Sanjo-dori. It is the happening street in the area with hundreds of shops selling souvenirs and local delicacies. There is always a buzz along the street and I love to visit it often, just to have a good time.

A brief history of Kofuku-ji

Today Kofuku-ji is one of the head temples of the Hosso sect of Buddhism but it has had a very humble beginning. In the year 669 CE, Kagami no Okimi, the consort of Nakatomi-no-Kamatari, founded a Buddhist temple on their family estate in Yamashina Suehara (modern-day Kyoto) to pray for her husband’s recovery from illness.

Her literary works appear in Manyoshu, the oldest extant collection of Japanese waka (poetry in Classical Japanese), compiled sometime after AD 759 during the Nara period. In “Manyoshu,” her name appears as ‘鏡王女’ while in “Nihonshoki” (Chronicles of Japan) it is ‘鏡姫王.’ Her poems are said to be composed after Kamatari’s death, in the memory of her husband. She is also widely considered to be the birth mother of FUJIWARA no Fuhito, who later went on to be the founding patron of Kofuku-ji.

This temple which came to be known as Yamashina-dera was relocated to its present site shortly after the establishment of Heijo as the capital of the empire. The temple was renamed to Kofuku-ji and it grew rapidly in size under the patronage of successive emperor and empresses. During that time the Fujiwara clan had great influence over the imperial family and their blessings to Kofuku-ji, propelled its rise to an important influence even in political matters. In the Heian period (794-1180), the temple assumed control over the Fujiwara tutelary shrine of Kasuga and rose to become the dominant power in Yamato province.

Over time with the decline of the Fujiwara clan, the temple lost its shine. The temple was destroyed by the Taira, rivals of the Fujiwara, in the 12th century Heike wars. Financial pressures eroded the political influence that it had previously enjoyed. In 1595, during the reign of Toyotomi Hideyoshi, the temple was stripped of its last remaining estates and replaced them with an annual endowment of only 21,000 koku of rice. Although this amount was sufficient for the maintenance of the temple grounds, a catastrophic fire in 1717 destroyed most of the temple complexes.

With waning power, Kofuku-ji became one of the primary targets of the anti-Buddhist policies of the early years of the Meiji period (1868-1912). In 1868, the Japanese government brought out an ordinance called shinbutsu bunri, which ordered the separation of Shinto from Buddhism. This brought to an abrupt end the centuries-old tie between Kasuga and Kofuku-ji. After a few years when things calmed down, Kofuku-ji was granted permission to re-establish itself as a religious institution.

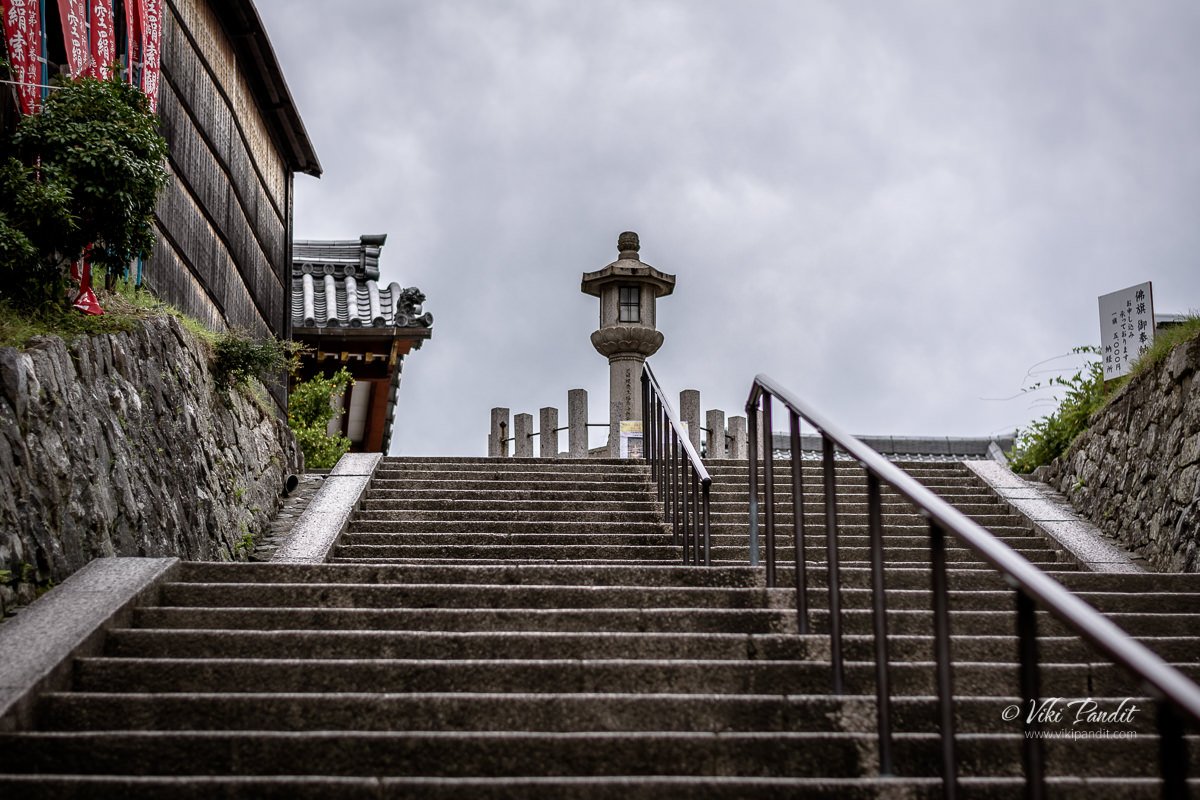
As you keep walking along the Sanjo-dori. the road will open up near a pond, that falls on the right. it is the Surosawa pond. On your left, you will find a stone staircase that will take you inside the Kofuku-ji grounds. These stairs always remind me of the end scene from the movie “Your Name.”

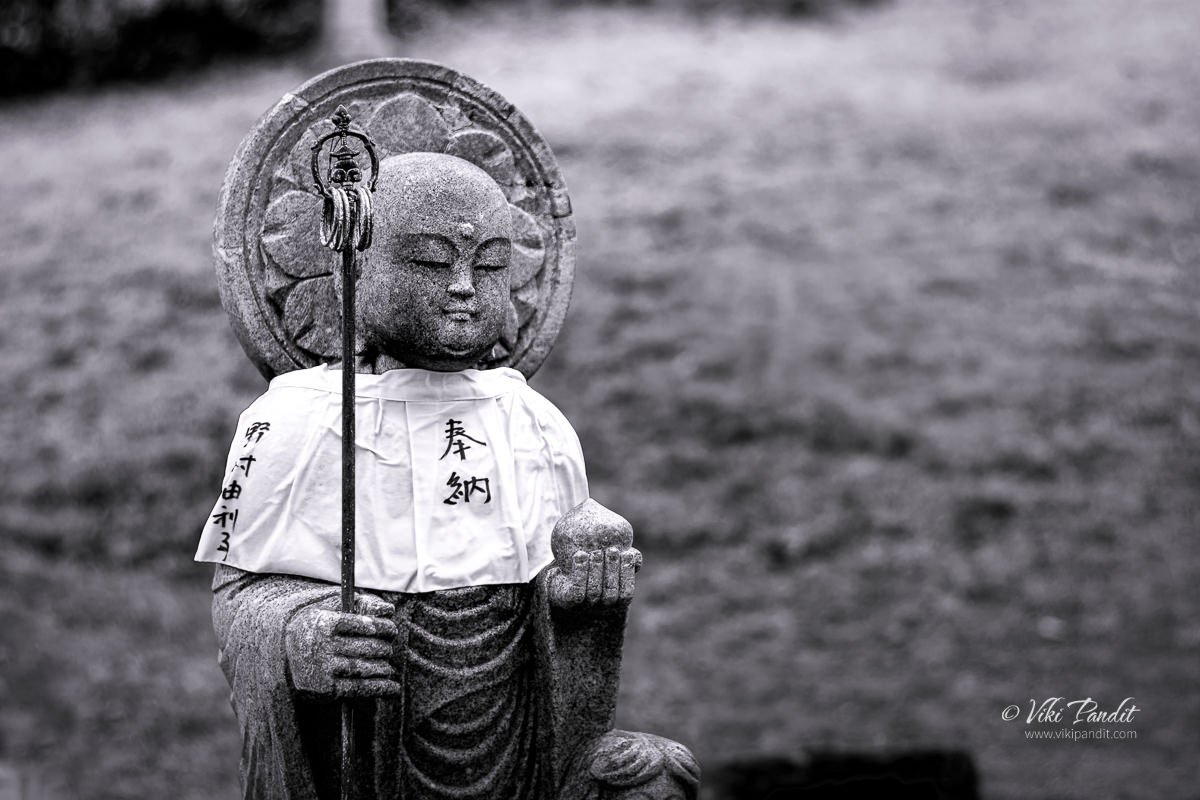
As I went up the stone stairs, midway to the top, there is a left path, where you can find a Jizo statue surrounded by idols of little children. I spent some time here with the Jizo. The idol is carved out of a single piece of stone. It reminded me of the stone idols from our Hampi trip. The Sun was soft and I was able to get some nice sharp images.

The Jizo referred to as “O-Jizo-san” in Japanese honorific language, is a deity fondly loved by Japanese people. You will find Jizo statues like this in many places including Buddhist temples, graveyards, beside lakes, and even at the corner of some streets in the cities. If you are interested in exploring more, you should visit the Hase-dera temple in Kamakura which is said to host, on its grounds thousands of Jizo statues.

During colder times, you will find them draped in red. Jizo statues are clothed in red bibs and sometimes also hoods. What is a bit funny for me is that, you might also sometimes find cans of Sake beside the statues. The Japanese mostly pray to the Jizo wishing for protection for their lost baby so their spirits might go to heaven without suffering.

Three Storeyed Pagoda

Just beyond the Jizo statue there lies a three-story pagoda. This Pagoda was originally built in 1143 CE at the behest of Fujiwara no Kiyoko, the consort of Emperor Sutoku. The current pagoda was recreated shortly after the destruction of the entire temple complex in 1811, making it one of the oldest of the structures at Kofukuji.

The first storey contains a set of four murals painted on wooden panels that each depicts a Buddha. In addition, the goddess Benzaiten (Saraswati) is enshrined on the eastern face of the central pillar.

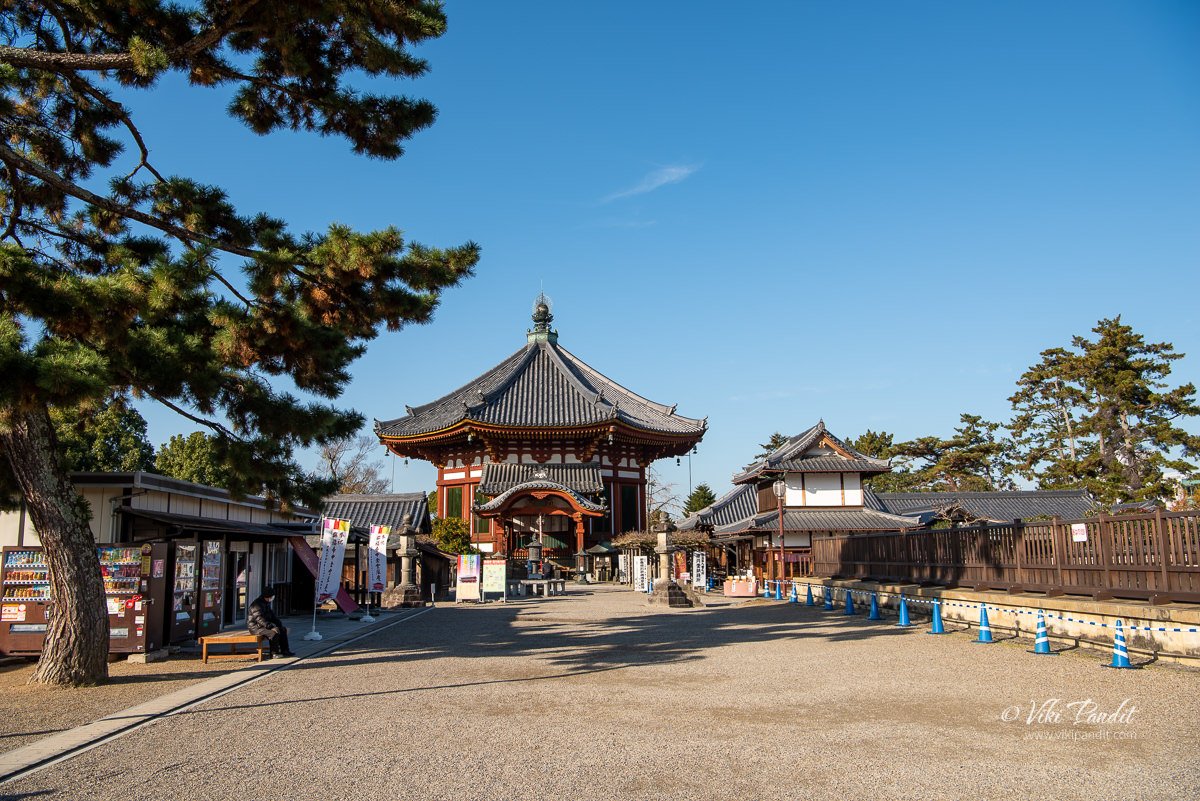
After taking some shots of the pagoda, I retraced my steps back to the staircase. As you reach the top you will find yourself in front of the Nanendo hall or commonly referred to as the Southern Hall. Before you go for the hall, if you check on your right, you will find a Chuyoza, a place to purify yourself before you go to pray at the temple.

It’s not much of a deal, you just take the ladle, fill it with the running water and wash your hands one at a time. In the end, you let the remaining water drip down along the handle of the ladle where you were holding it, in a way cleansing it for the next person to use.

The Southern Hall

The southern octagonal hall was initially built in 813 by Fujiwara no Fuyutsugu, in memory of his father. The current hall is the fourth reconstruction and was erected between 1741 and 1789. Enshrined inside it is a seated image of Fukukensaku Kannon.

The southern hall is opened to the public only one day in the year on October 17th

Some people were praying in front of the Nanen-do hall. The air was smoky with the incense sticks burning on an urn placed in front of the temple. Beside the temple hall, there is a small shop that sells incense sticks for ¥100. You can choose between sticks for praying for either health, happiness, or wealth. The words are written in Japanese only, so you might need someone to assist you if you are not able to understand which one to choose.

A left turn here will take you to the Hokuen-do. It was built in 721 by the Empress Gemmei and Emperor Gensho to commemorate the first death anniversary of Fujiwara Fuhito. The building originally dates back over a thousand years, and their present reconstructions were completed in 1210 respectively. The building also houses some of the temple’s treasured artifacts but is only open to the public only a few days a year. Notably among them is a set of four images of the heavenly kings that were created in 791, the finest examples of Japanese dry-lacquer sculptures.

The building is open to the public only on special days every year. The dates of this period vary every year, so please contact the temple authorities before visiting.

A few steps ahead there is a flat base, where once Kofukuji’s main building, the Central Golden Hall used to stand. It was destroyed in a fire in 1717 and – although a replacement hall was built on a smaller scale in the 1800’s – the original Central Golden Hall was not reconstructed. Reconstruction works are currently ongoing and are scheduled to be completed in the year 2018.

The Central Golden Hall opened in 2018, I have updated the details at the end of the journal.

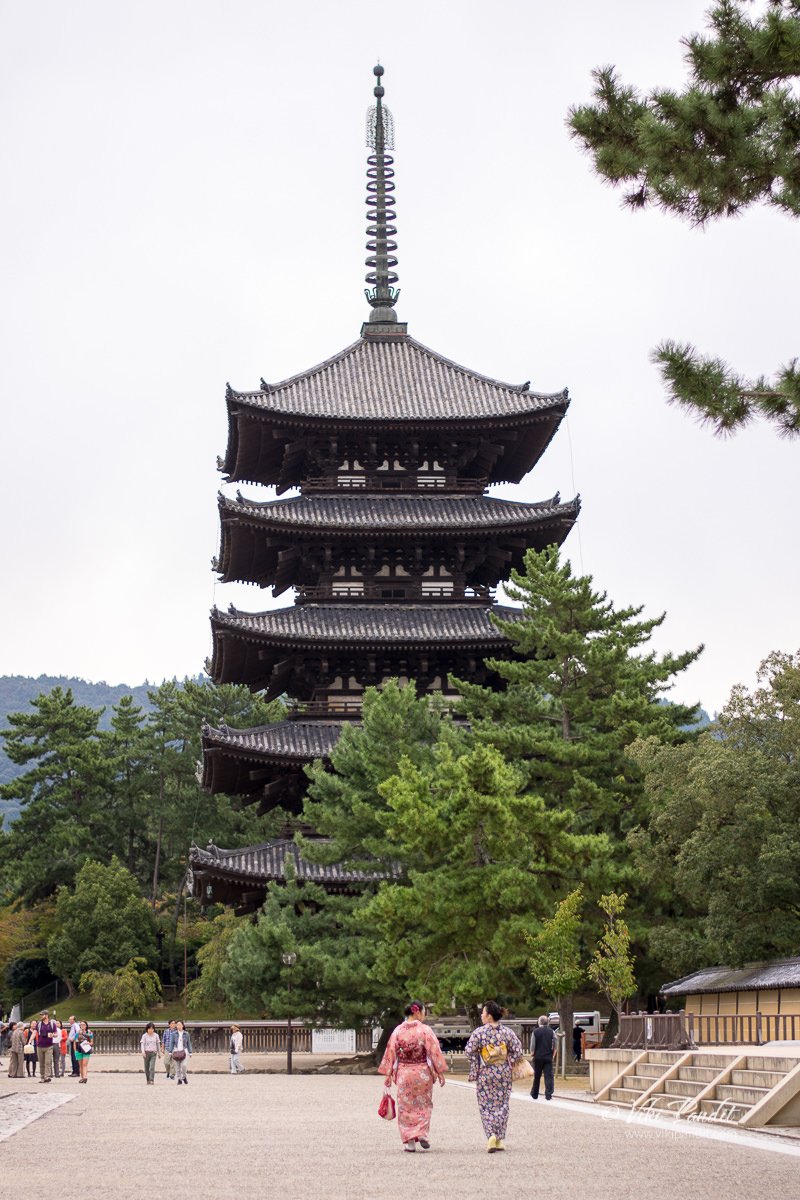
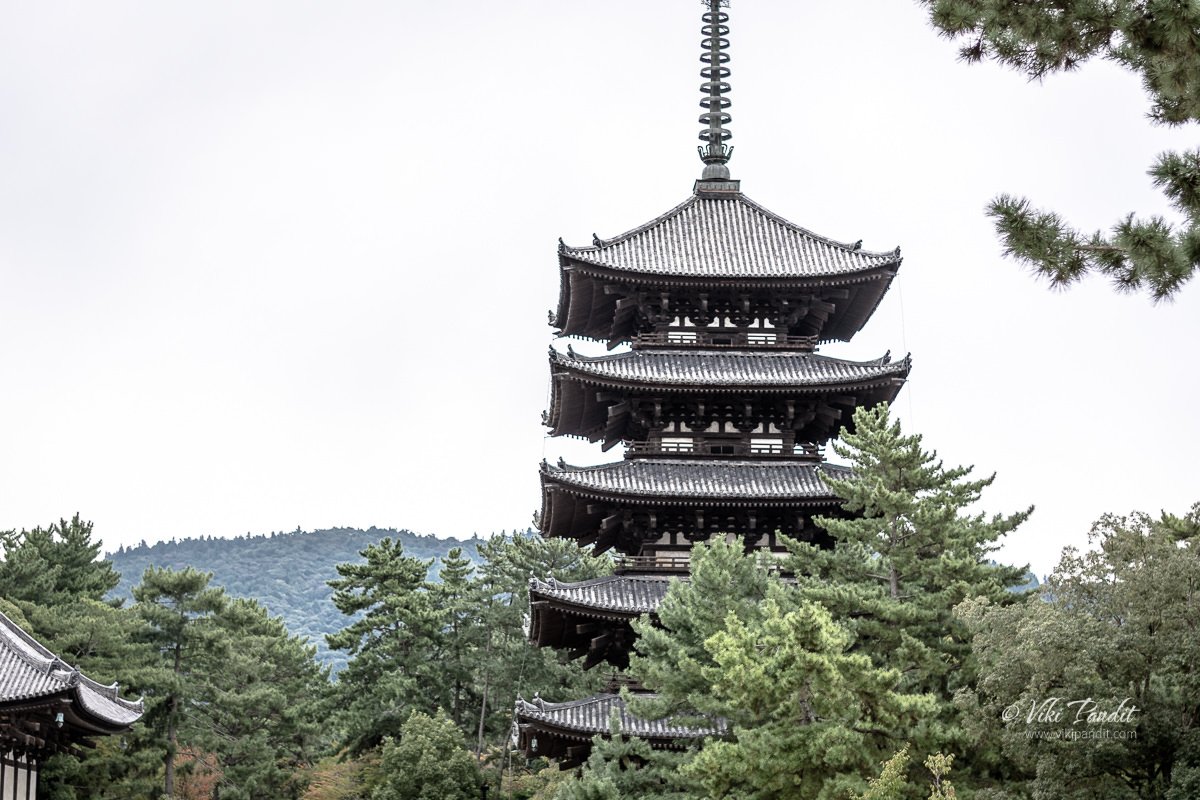
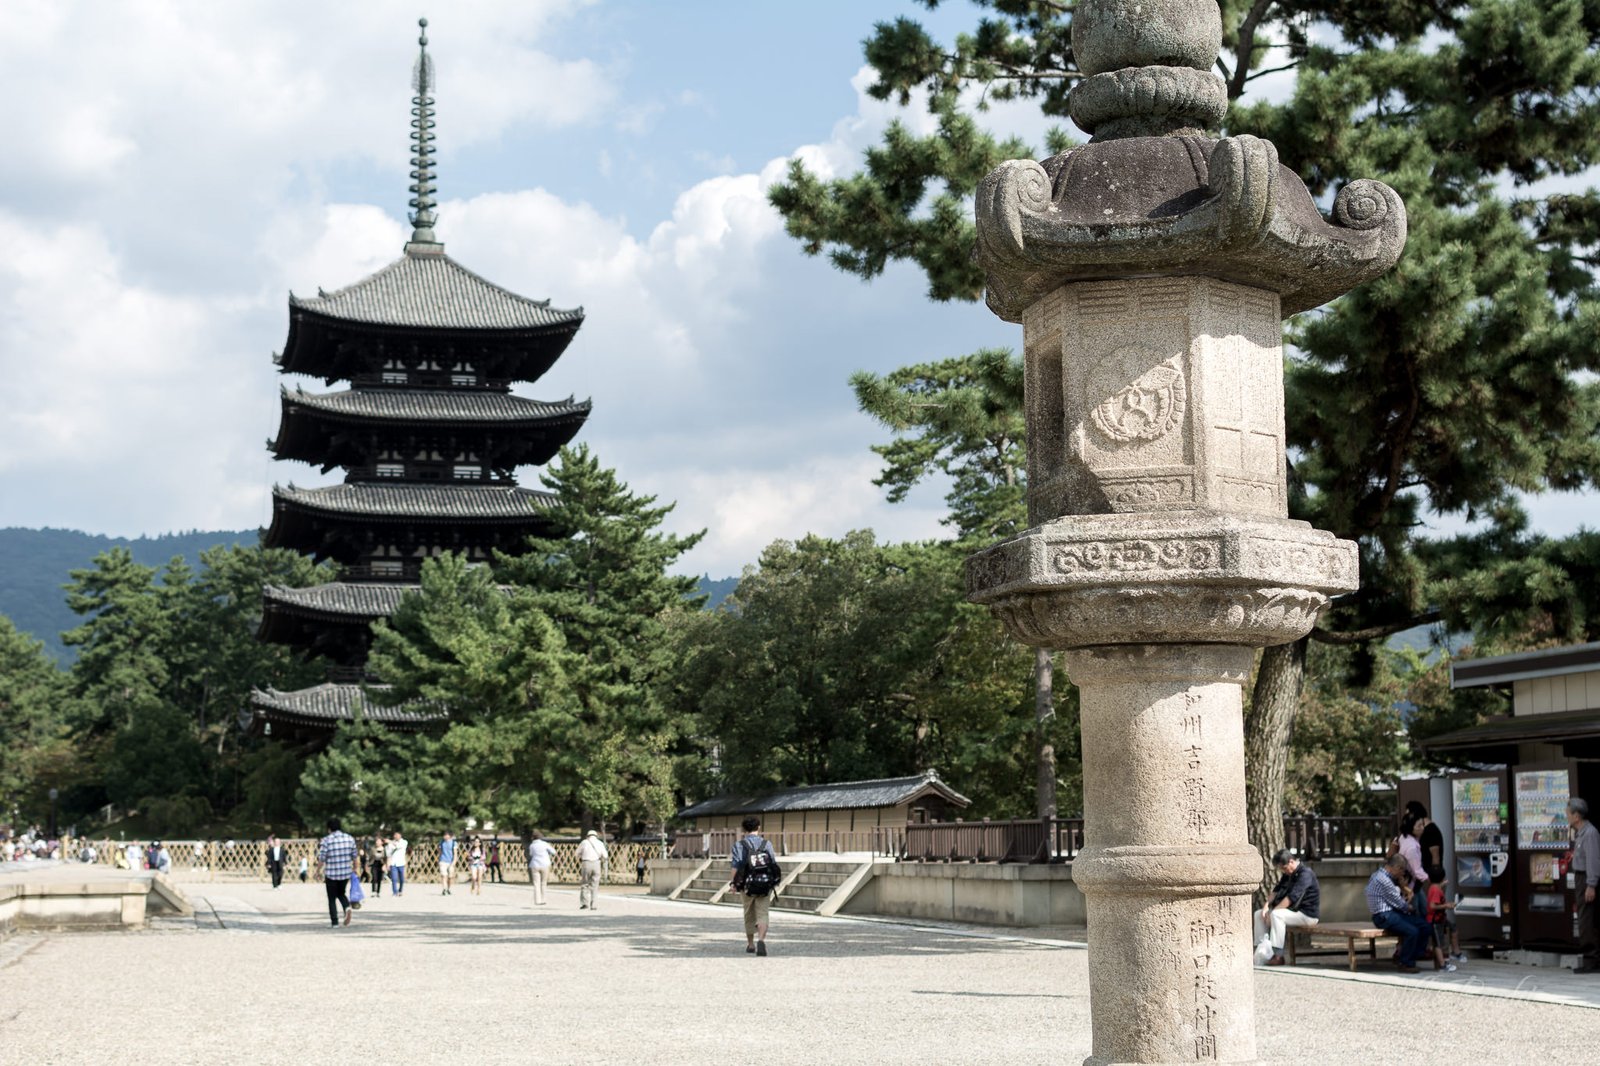
For me, Kofuku-ji’s main attraction is the five-story pagoda known as Gojunoto. At 50.1 meters, it is the second tallest pagoda in Japan after Kyoto’s Toji Temple. The construction of the Five-storied Pagoda was originally started in 730 by Empress Komyo, the daughter of Kofukuji’s founding patron: Fujiwara no Fuhito.

Over its long history, the pagoda burned down a total of five times, with the latest reconstruction dating to around 1426. Enshrined around its central pillar, on the first story are a Yakushi triad (East), a Shaka triad (South) and an Amida triad (West) and a Miroku triad (North)

Lots of women visiting the temple were in the traditional Kimono. It was a beautiful sight to see them walking past the ancient temple. If you are interested in obtaining a Kimono for rental, there are many places along Sanjo-dori, but you have to book it in advance.

Eastern Golden Hall

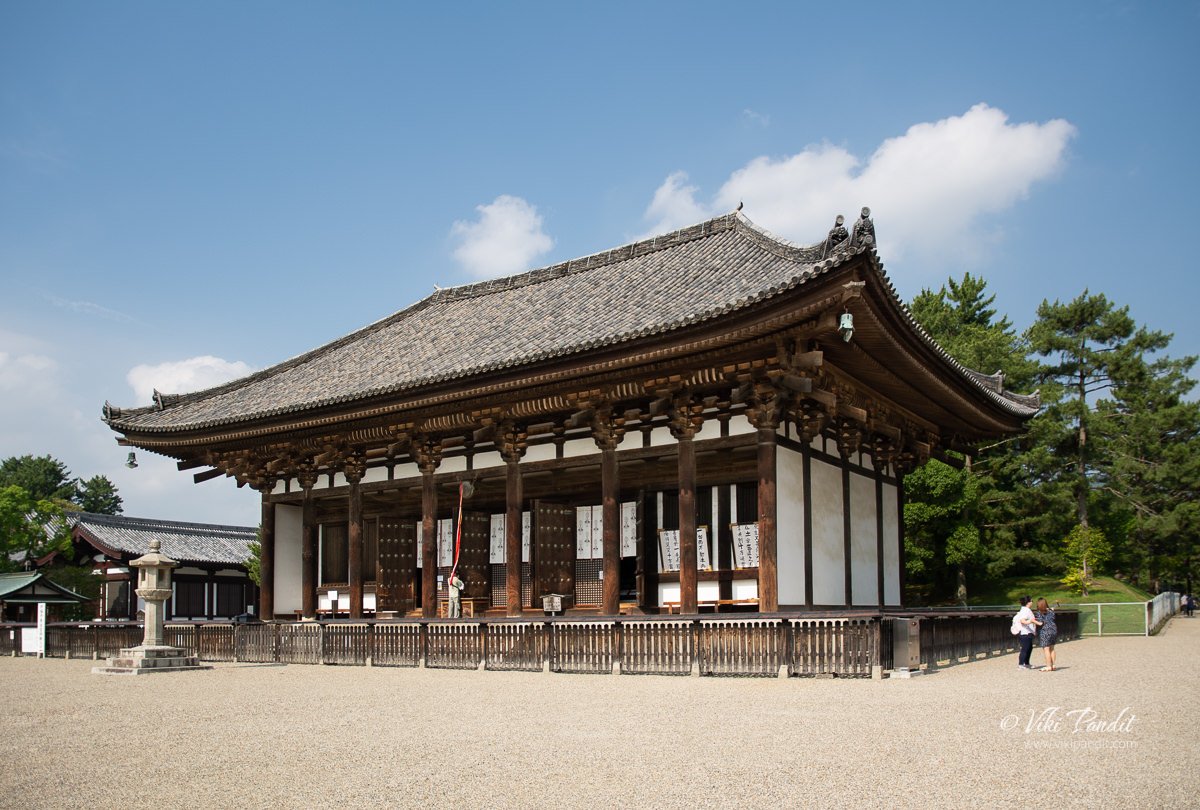
Beside the Gojunoto is the Easter Golden Hall. The Eastern Golden Hall (Tokondo) was originally constructed in 726 by Emperor Shomu to speed the recovery of the ailing Empress Gensho. Rebuilt in 1415, the Tokondo hall is dominated by the presence of a large image of Yakushi Nyorai (the Healing Buddha) along with the Bodhisattava Nikko & Gakko. The hall also features seated images of 12th-century wooden Monju Bosatsu and Yuima Koji, surrounded by standing images of Four Heavenly Kings.

National Treasure Hall

The Kofuku-ji National Treasure Hall (Kokuhokan) was erected in 1959 to house images, paintings, ritual artifacts, and historical documents that were enshrined in temple buildings that no longer exist. Among the most notable treasures are an 8th-century statue of Ashura (one of Buddha’s eight protectors) carved in the 8th century, an even older bronze head of Yakushi Nyorai, and 12th-century carved wooden statues of priests with strikingly human facial features.

While entrance to Kofukuji’s temple grounds is free and possible around the clock, there are two areas that require paying an entrance fee: Kofukuji’s National Treasure Museum and the Eastern Golden Hall. The recently renovated National Treasure Museum exhibits part of the temple’s great art collection and is an absolute must-see for lovers of Buddhist art. Among the many outstanding exhibits is the three-faced, six-armed Asura Statue, one of the most celebrated Buddhist statues in all of Japan. Unfortunately for me, it was closed on the day.

Kofuku-ji is a nice place to enjoy the history of Nara. Besides the temple, there are many other things to enjoy in Nara Park. If you are the explorer type, you should also check out Umikodo Pavilion, when looks stunning at night.

Kofuku-ji in Fall

Since I lived nearby, I came to Kofuku-ji many times. This is a shot of the beautiful pagoda during the fall. Nara Park has a brilliant fall and if possible, you should plan a trip at that time. For more information you can check out my journal of Nara during Fall.

Update: Central Golden Hall

The Central Golden Hall was opened to visitors in October 2018. Initially, the hall was constructed between 710 and 714 at the behest of Fujiwara-no-Fuhito. It has had an unfortunate history, with the building burned down a total of 7 times. The most recent of these fires occurred in 1717. With dwindling finances, more than a century passed before a temporary structure was finally erected in 1819.

However, the hall suffered extensive damage due to a leaking roof and had to be demolished in 2000. The newly constructed hall faithfully reproduces the Nara-period original based on archaeological evidence, drawings, and other historical records.

We came back at night to capture the celebration of the opening of this grand hall. At the time of writing this, visitors are not allowed to photograph the inside of the hall.

Later that night, we had a quiet stroll along Surosawa pond. The atmosphere becomes quite calm once the day tourists go back to Kyoto and you can enjoy some quiet time by yourself near the pond. I have spent many evenings here, just sitting and staring at the surroundings. A vending machine nearby will fulfill most of your needs if you are thirsty.

Kofuku-ji is one of the first temples I visited when I came to Japan and it will always have a special place in my memories. If and when you are visiting do not forget to explore Nara Park, it is huge and you will never forget the experience of the deer moving around among humans as you could only imagine in fantasy stories.

Thanks you so much for reading. I hope you have a wonderful time experiencing Nara as I did. Please leave me a comment if you liked my story or if you need to ask anything. I am also available on Instagram if you want to connect. Peace.

Admission Fees to Central Golden hall

Adults: ¥500
School Students: ¥300

Admission Fees to National Treasure Hall

Adults: ¥700
School Students: ¥600

Admission Fees to Eastern Golden Hall

Adults: ¥300
School Students: ¥200

When was Kofuku-ji built?

Kufuku-ji had a very humble beginning and the first structure was built in 669 CE in old Kyoto. It was later moved to Nara and succeeding generations of the Fujiwara clan kept building on it until it became a massive temple grounds comprising of over 140 buildings.

Who built Kofuku-ji

The first structure of the Kofuku-ji temple was commissioned by Kagami no Okimi, the legal wife of FUJIWARA no Kamatari. To pray for the recovery of Kamatari’s illness, she established Yamashina-dera Temple in 669 CE, which later became Kofuku-ji Temple.

A Walk through Nara Deer Park

The sun was shining and it was a lovely day for a walk in the Nara Deer Park. Nara Park is a huge park in central Nara. Established in 1880, it is the location of many of Nara’s attractions including Todai-ji, Kasuga Taisha, Kofuku-ji, but the star attraction is the herds of Deer roaming freely all over the park. We left our home after a quick breakfast at Nara University Cafeteria.

Nara is best experienced by walking. The closest temple on the map is Kōfuku-ji, around 10 minutes walk from Kintetsu Nara Station. A narrow alley beside the Station connects the road to Kofuku-ji. The road to the temple is lined with souvenir shops and eateries on both sides.

Kōfuku-ji

Kōfuku-ji is a Buddhist temple that was once, one of the powerful Seven Great Temples, in the ancient city of Nara. The temple is also one of eight Historic Monuments of Nara inscribed on the UNESCO World Heritage List. The Kofuku-ji temple area contains 3 main buildings, the biggest being Gojunoto, the five storied pagoda. The first monument we noticed is a three-storied pagoda named Hokuen-do. A flight of stairs took us to  Tokon-do, another temple. Both Hokuen-do and Tokon-do have been designated National Treasures of Japan. There is a stone wash basin just before the Tokon-do temple where one can wash their hands in sparkling cold water. Before praying to the Shinto deity, worshipers are required to purify themselves of impurity. The washing of hands with water is called Temizu. Most shrines have similar stone wash basins where visitors can rinse their hands before approaching the deity.

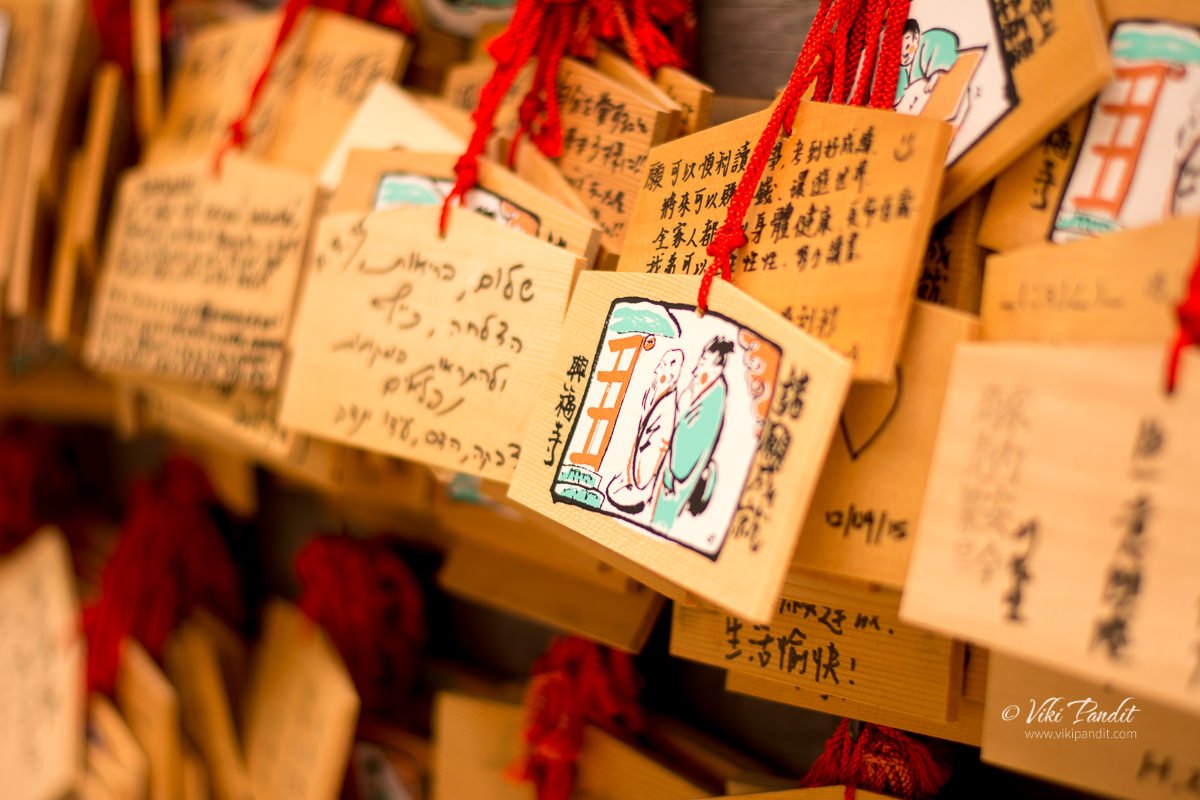
Just beside the hand-washing fountain/basin is a wooden board where numerous people have tied their prayers on small wooden plaques. These plaques, sold at the Shrine, are called Ema. Worshipers buy the plaque, write their wish on it, then hang it on the Ema stand, in hopes the shrine deity will grant their wish.

The beautiful smell of incense sticks drew us towards the Tokon-do temple. I got one for Mani from a stall beside the temple. They cost 100 Yen each. Mani later told me that the incense was for “Happiness” There were others meant for praying for health and peace too. After lighting the incense, we went directly opposite, towards the five-storied pagoda.

Kofuku-ji was initially built in 1426 in accordance with traditional Japanese construction techniques. Since then, the present building has been rebuilt over time. It measures 50 m in height, making it the second tallest pagoda in Japan. We admired the awe-inspiring architecture for some time. I am short of words to describe the beautiful and majestic pagoda. I have never seen a more huge wooden structure in my life.

Nara Deer Park

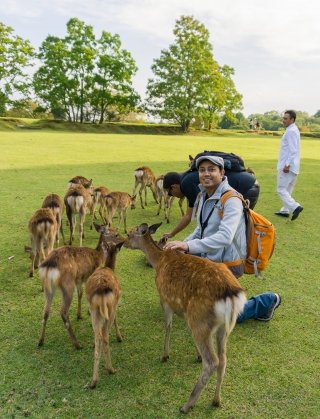
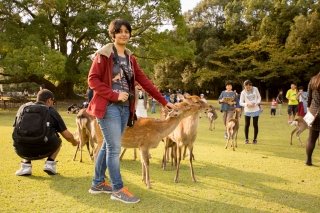
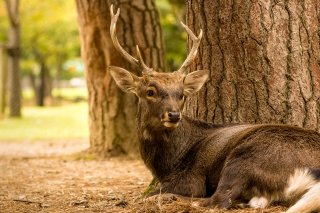
A small path towards the back of Kofuku-ji directed us towards the main Park area also known as Nara Koen. The park is home to hundreds of freely roaming deer. Considered in Shinto to be messengers of the gods, Nara’s nearly 1200 deer have become a symbol of the city. According to the legend, Takemikazuchi-no-Mikoto, the kami of the Kashima Shrine in Ibaraki, was once invited to come to Kasuga Taisha, in Nara. He arrived in Nara riding a white deer, and since then the deer are considered sacred beings, divine messengers of Kami. Nara’s deer are tame, although they can be aggressive, specially the male ones, if they think you will feed them. Deer crackers are for sale around the park, and some deer have learned to bow to visitors to ask to be fed.

We walked past Kōfuku-ji on a narrow path laden with soft pebbles. We bought some Shika Senbei, deer crackers from one of the several stalls. The deer keep loitering around the stalls and they came running towards us as we walked away from the stall. The path opened up into a small meadow where several Deer young-lings were feeding on the green grass. We stayed there among the deer, feeding and playing with them. One of them softly landed a couple of head butts on me. It was fun and will be one of the fondest memories of my life.

After a while we got hungry too and went inside a Ramen shop to have some food.

Kasuga-Taisha

It was late afternoon when we walked beyond the meadow, up towards the forested Wakakusayama Hill. The path up the hill took us towards Kasuga Taisha. The approach path is lined on both sides with scores of stone lanterns. The lanterns are lit up in times of festivals and it must look awesome. After walking for a few minutes the meadows gave way to a more dense forest as we climbed up the Wakakusayama Hill. Located a short walk towards the Kasuga Shrine main complex is the Kasuga Taisha Shinen Manyo Botanical Garden. This garden displays about 250 kinds of plants described in the Manyoshu, Japan’s oldest collection of poems which dates to the Nara Period. A large part of the garden is dedicated to wisteria flowers which usually bloom from late April to early May. The sun was on its descent so we decided to skip it, hoping to come during spring when the flowers will be in full bloom.

Kasuga Taisha is Nara’s most celebrated shrine. It was established at the same time as the capital and is dedicated to the deity responsible for the protection of the city. The shrine’s offering hall can be visited free of charge, but there is a paid inner area which provides a closer view of the shrine’s inner buildings. Kasuga Taisha is famous for its lanterns, which have been donated by worshipers. Hundreds of bronze lanterns can be found hanging from the buildings. The lanterns are only lit twice a year during two Lantern Festivals, one in early February and one in mid August. At the gate one can find many souvenir shops. Girls, dressed as beautiful priestess attend to the visitors.

There are many smaller shrines in the woods around Kasuga Taisha, twelve of which are located along a path past the main shrine complex and are dedicated to the twelve lucky gods. Among them are Wakamiya Shrine, known for its dance festival, and Meoto Daikokusha, which enshrines married deities and is said to be fortuitous to matchmaking and marriage. Rather than going inside Kasuga Taisha, we decided to walk along the forest towards these smaller shrines. The path kept going up. It was exciting walking by ourselves surrounded by the dense forest. After reaching  the end of the path at Shin-Yakushiji-Temple, we started our descent back to civilization. Back on the road, the tourists were sparse, so we decided to pay a quick visit to the Todai-ji temple.

Tōdai-ji

Unfortunately the temple had closed at 5 p.m. so we just loitered around the grounds of the temple.

Todai-ji is one of Japan’s most famous and historically significant temples and a landmark of Nara. The temple was constructed in 752 as the head temple of all provincial Buddhist temples of Japan and grew so powerful that the capital was moved from Nara to Nagaoka in 784 in order to lower the temple’s influence on government affairs.

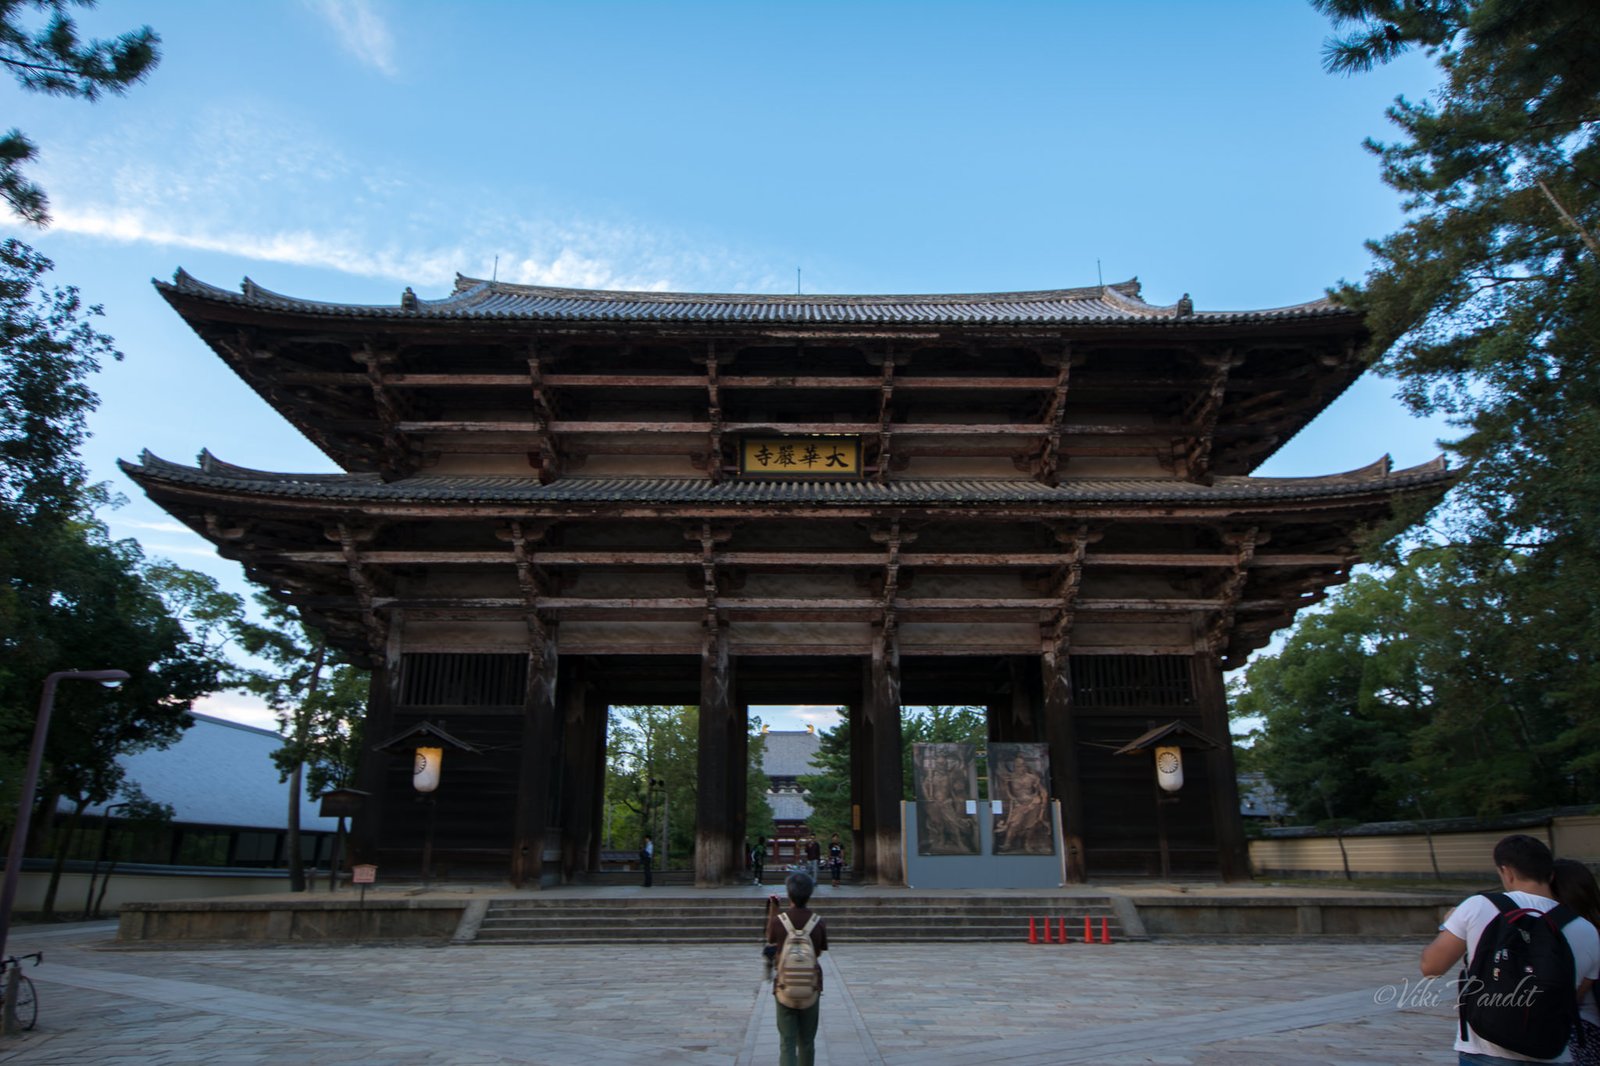
Along the approach to Todaiji stands the Nandaimon Gate, a large wooden gate watched over by two fierce looking statues. Representing the Nio Guardian Kings, the statues are designated national treasures together with the gate itself.

It was going dark fast. We took some pictures of the gate. Towards the side of the temple is a lovely garden with wooded seats. The heavy camera bag had made me tired. We sat there for a while looking at the beautiful landscape. The slightly chilly winds at dusk felt really good. At 6 p.m. except for the street lights, it was totally dark, so we head back home.

I later went back for a photowalk to Todaiji a couple of times to witness the great Buddha in all its awesomeness. I was also lucky to celebrate New Years Eve at Todaiji when it is opened to public at midnight. If you cannot make it on new years, one can still enjoy a lovely walk in summer evenings at Todaiji when the park is illuminated.


An Evening in Rinku Town

Life sure could do with a little less Adventure…

Apologies for a bit of a rant first up. My day began with the most unfortunate news that I cannot buy a Pocket Wifi in Japan, not on my tourist visa. I could literally feel my face turn pale as we hurriedly set out for Kansai Airport to get the rental ones from SoftBank.

Kansai Airport is an 85 minute trip from the JR Nara Bus Stop in Nara. It costs 2500 Yen approx, depending on the Bus. The Airport Limousine ride to Nara from the Kansai Airport had cost us 2050 Yen, a couple of days before. It was a lazy ride with the bus passing through endless stretches of green paddy fields. We reached Kansai Airport around 3 p.m. The bus usually drops off passengers at Terminal One. We straightaway headed towards the SoftBank shop, which is a couple of floors below on the Ground Floor.

The SoftBank counter was devoid of the usual crowd and I was hoping they had a piece left. It is always a good idea to book your Pocket WiFi rentals at least 3 days in advance from the country you are travelling via internet. Not a very safe idea to just drop-in at the counter. They might not have stocks.

The rental cost me 1490 Yen per day inclusive of insurance, but they block around 40,000 Yen on the Credit Card in case the device would get damaged or lost. The process is fast and it didn’t take more than 15 minutes to get my Pocket Wifi.

After my moment of relief, and a pause after which color started to return to my face, we decided to stay back for a few hours.

When Mani had visited Japan, for the very first time, she had stayed at the Japan Foundation building in Osaka. So we agreed to spend the next few hours we had, at Rinku Town. A Limousine Bus is available right from the Airport to Rinku Town. It costs 200 Yen per person for the ride. While we waited, Mani got us a drink from the Vending machines. Vending machines were still a wonder for me, coming from India.

Rinku Town Premium Outlets

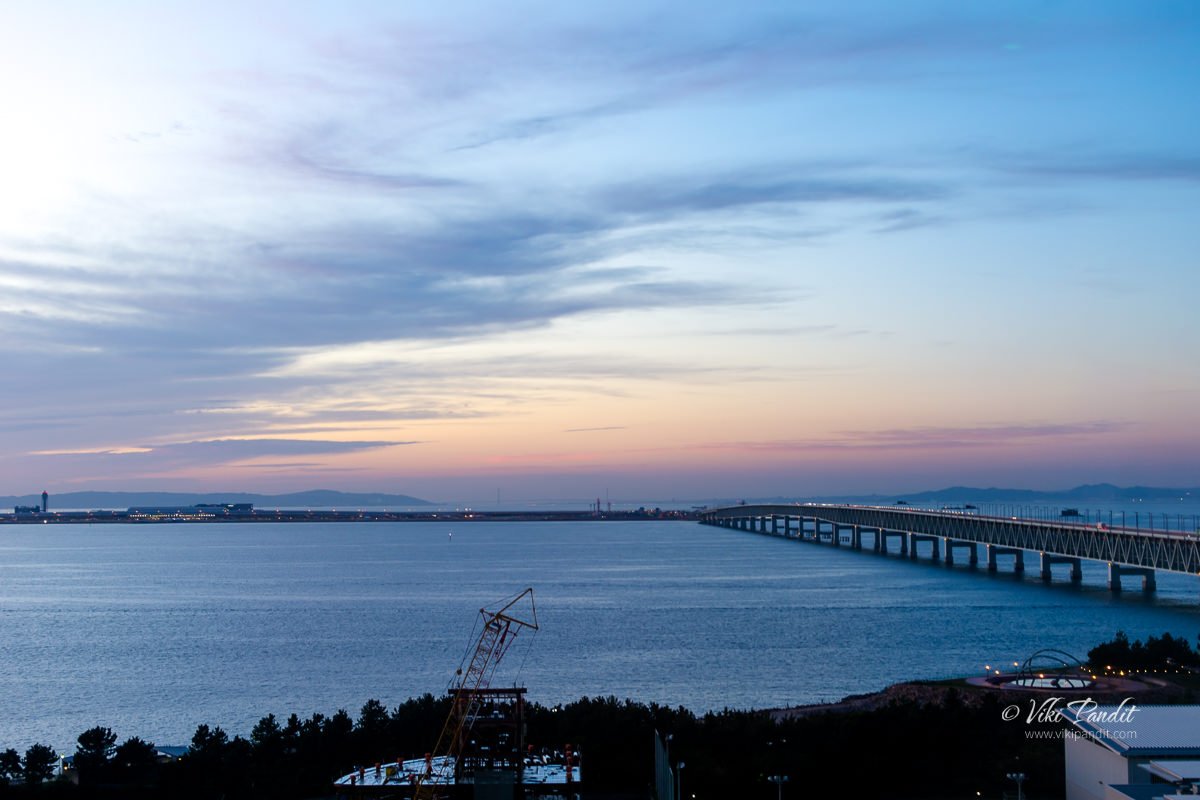
The bus was exactly on time. Midway, it stopped to drop off a few passengers at the Kansai Airport Observation Deck. The Airport is on a small island off the Osaka Bay and we drove past a long flyover over the blue sea. On the way Mani excitedly, pointed out to me, the Japan Foundation building, where she had stayed for over a month.

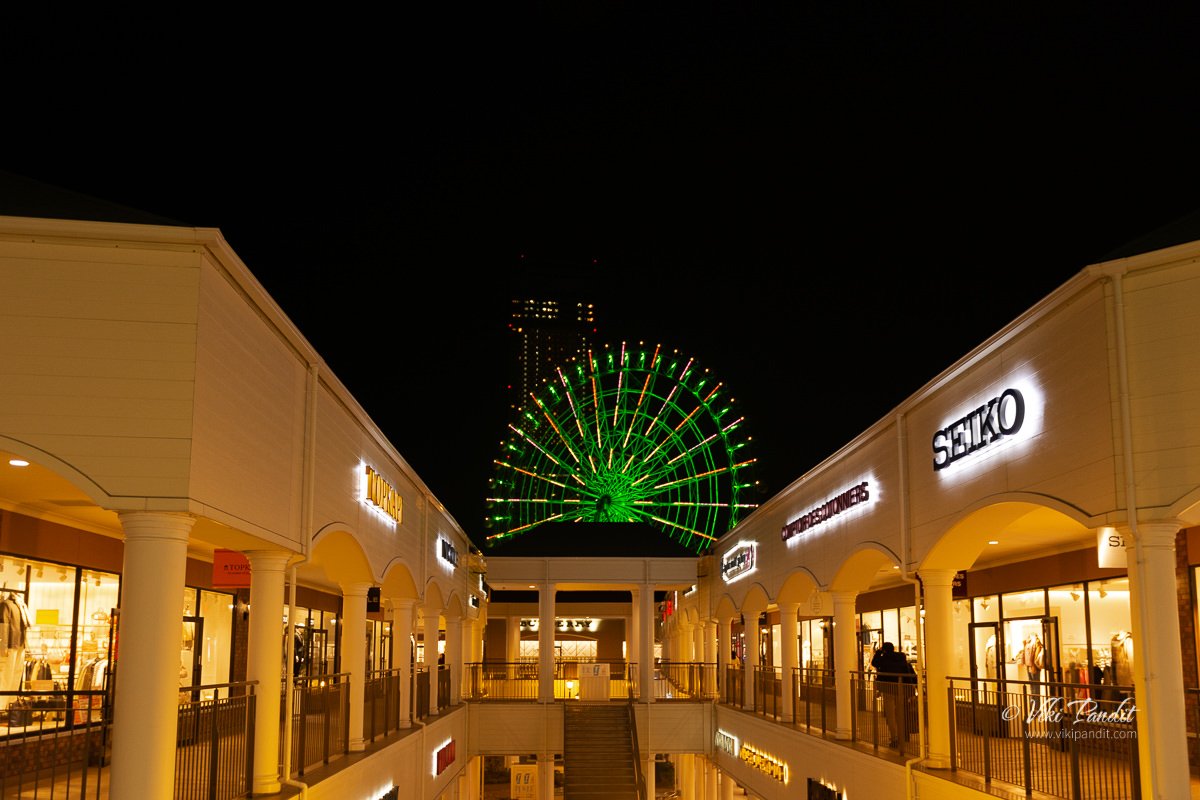
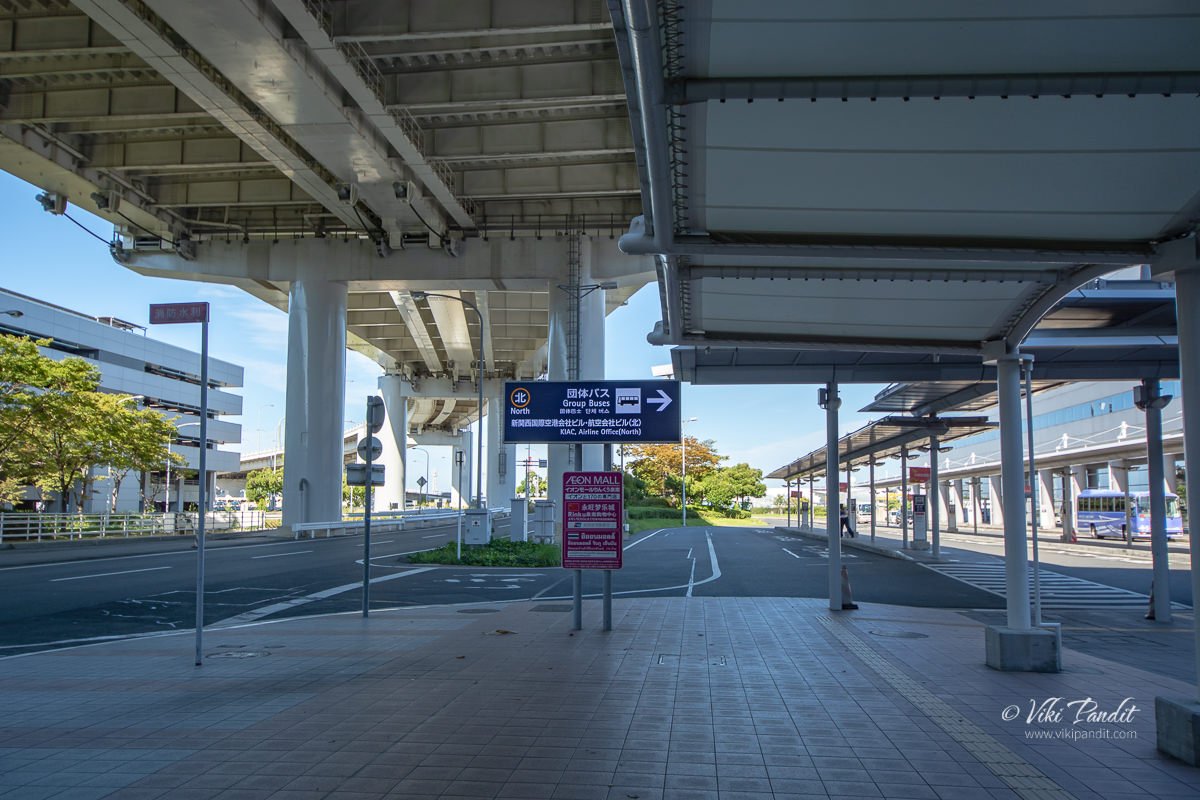
The ride to Rinku Town was about 30 minutes. The bus dropped us off at the Rinku Town Premium Outlets Mall. It’s a huge semi-open air mall, one of the largest shopping center in Osaka.

We roamed around the shops. I bought a scarf for Mani and a cap for myself. By 4 p.m. we were a bit hungry and we went inside a Ramen shop. The food was just as tasty as it looked.

Among the wide range of well-known foreign brands, I was happy to notice some of my favorite anime goods. But they were rather expensive.

Giant Ferris Wheel

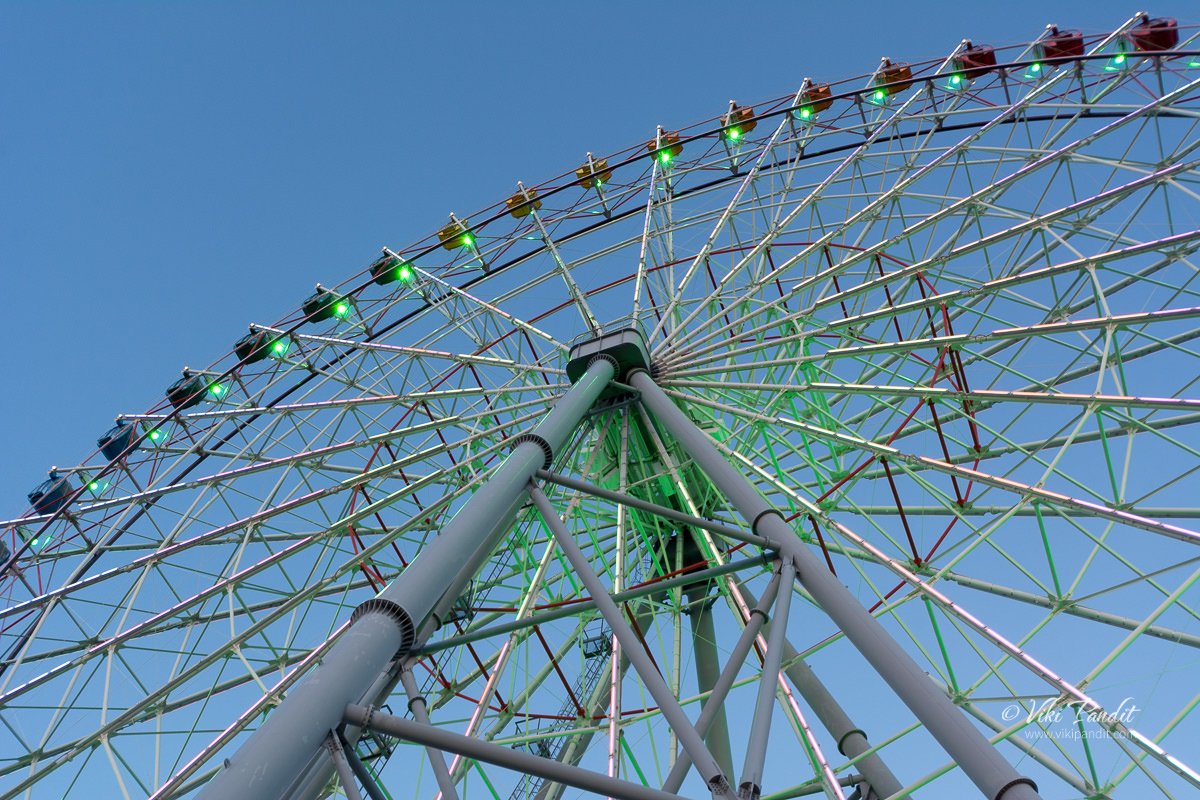
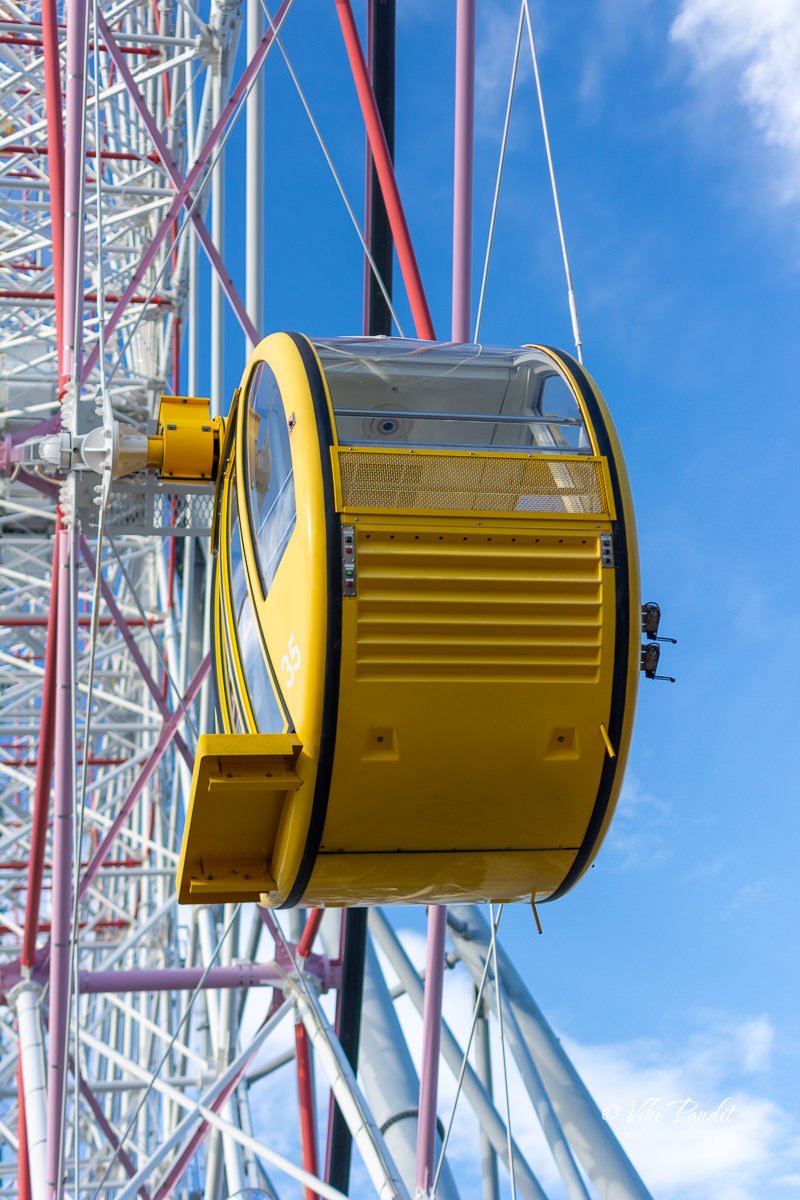
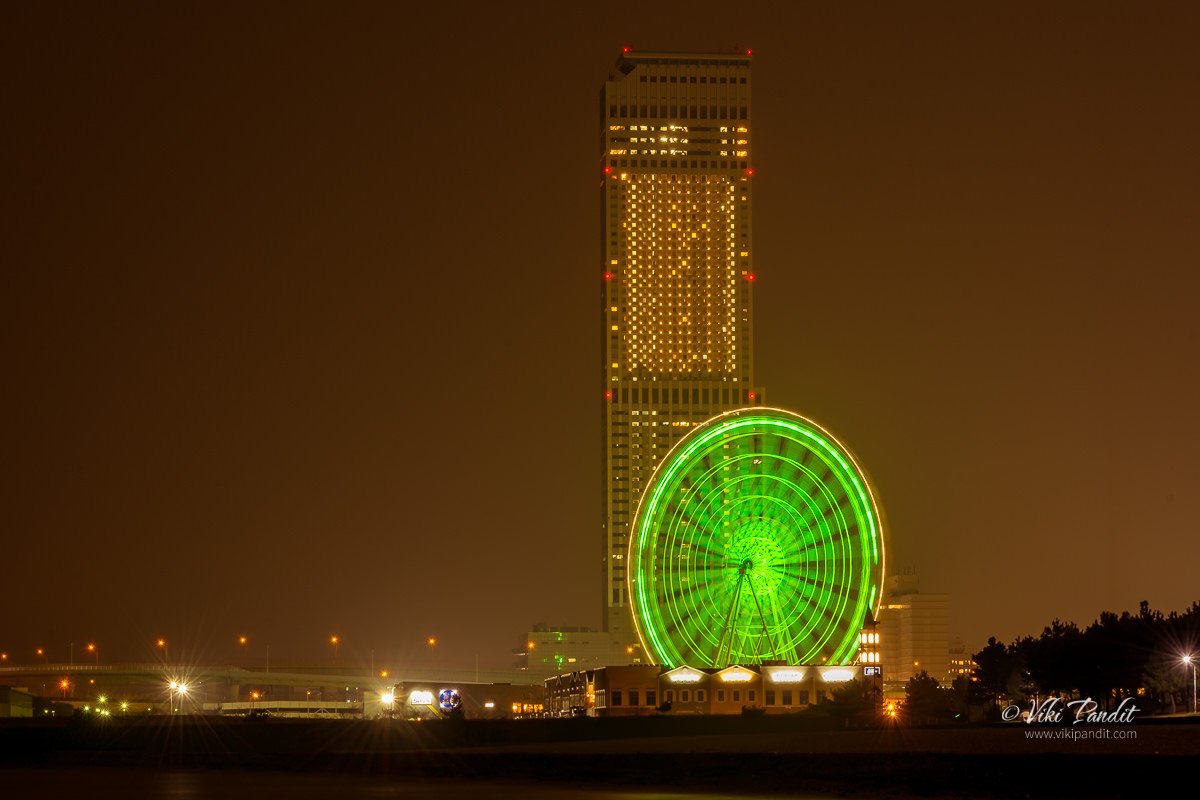
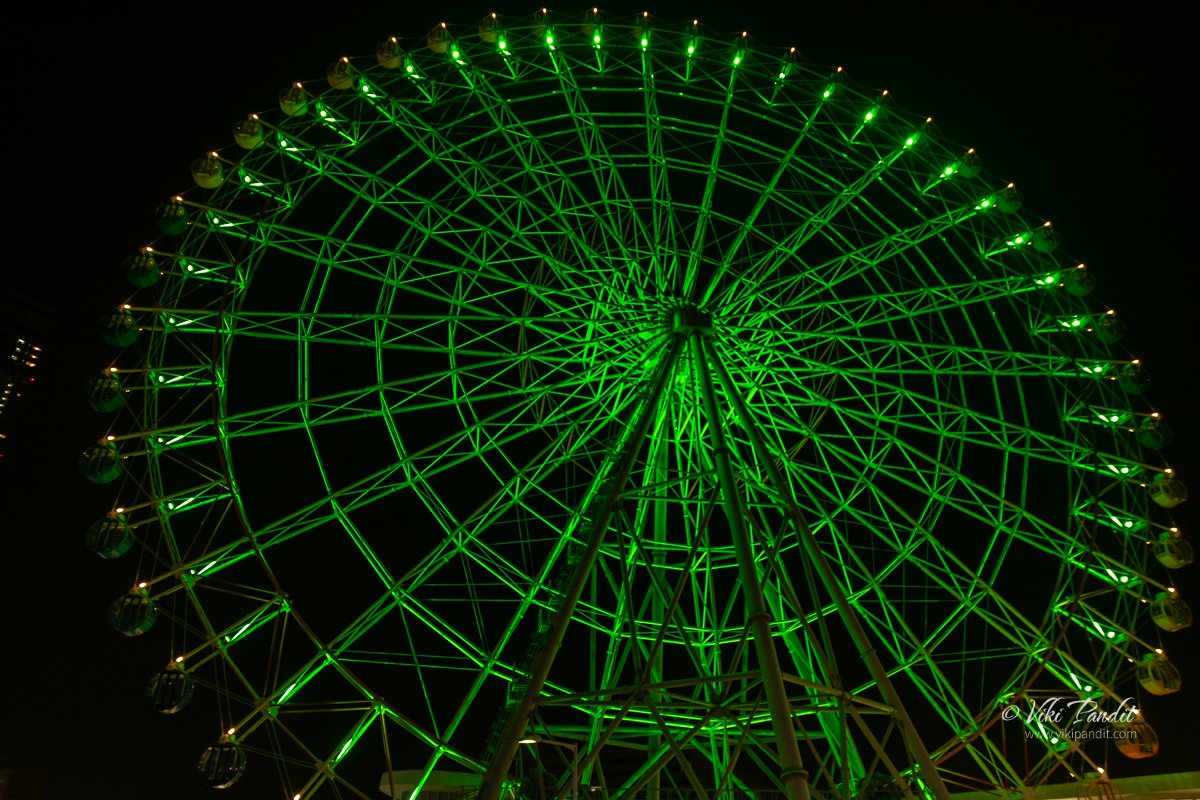
Rinku no Hoshi, the giant Ferris Wheel,  is a landmark of Rinku Town, and commands a panoramic view of the Bay area and Kansai Airport.

When we reached the giant wheel, it was still bright & sunny. We waited for a while for the sun to descend so we could enjoy the ride.

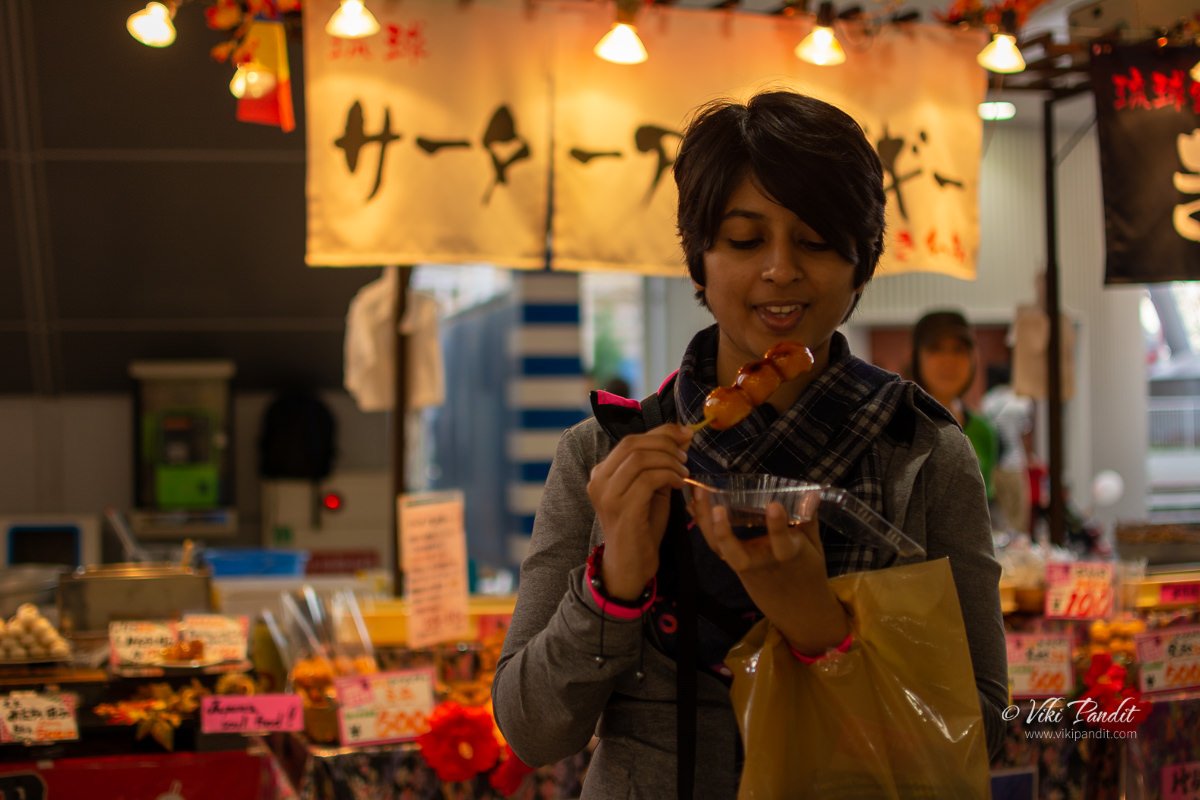
Just below the wheel, a sweet lady was selling Japanese sweets. Mani had some Dango. Mitarashi Dango is a sweet Japanese dumpling made from rice flour. They are generally served on a bamboo skewer and covered in a sweet soy glaze.

As the evening set in, we bought the tickets to the Ferris Wheel. A ride on the Ferris Wheel costs 700 Yen per person. If you want to go for a second ride, they give a discount coupon for 200 Yen.

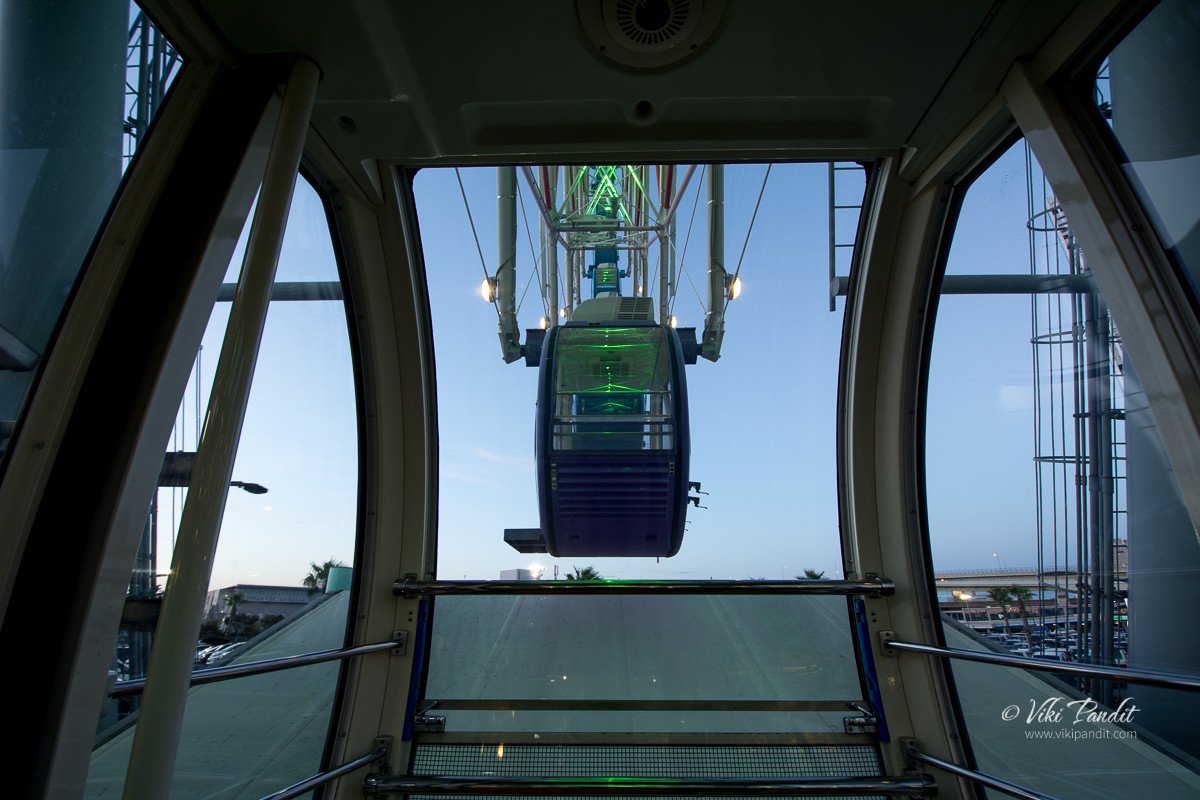
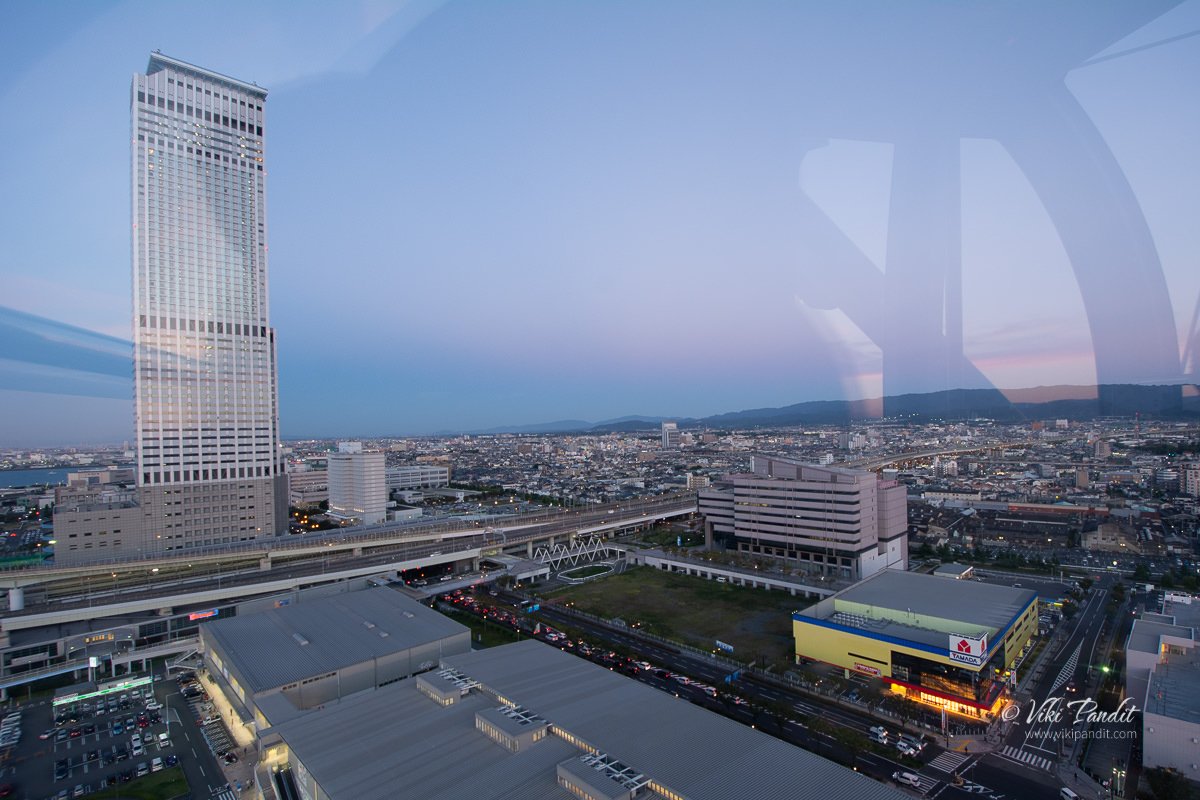
The ride on the Wheel is of 15 minutes, but it’s 15 minutes, awesomely spent. One one side one can see the beautiful city and on the other the vast ocean. 

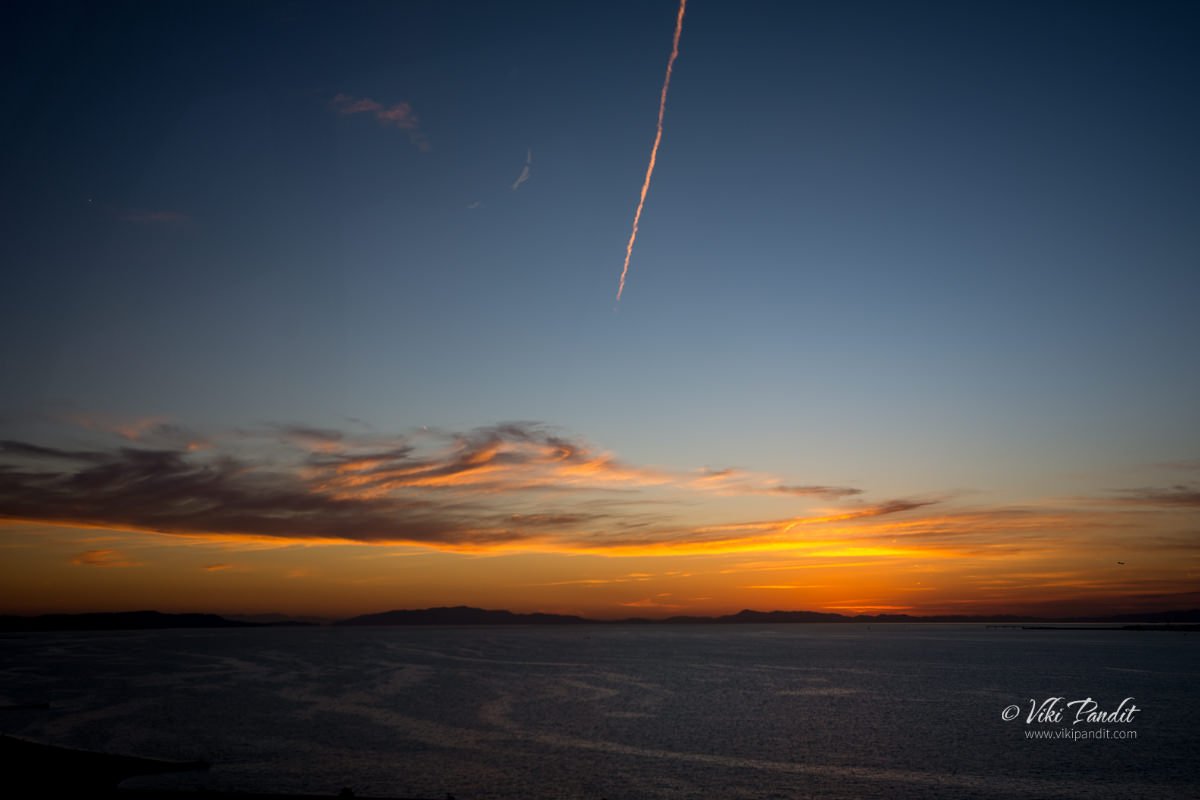
If you are up there on the Ferris wheel at sunset, it adds magic to the ride.

The Rinku town area in not about just the shopping mall. After the wonderful ride on the Ferris wheel, we wandered around the shore, catching some breathtaking shots along the bay.

Once the sun had set, in the fading light we could see the long bridge connecting the mainland to the airport.

As the light faded away, we walked down towards the Japan Foundation building. Mani used to tell me over voice chats how he would walk down to Rinku Town over the weekends, so I wanted to experience it myself.

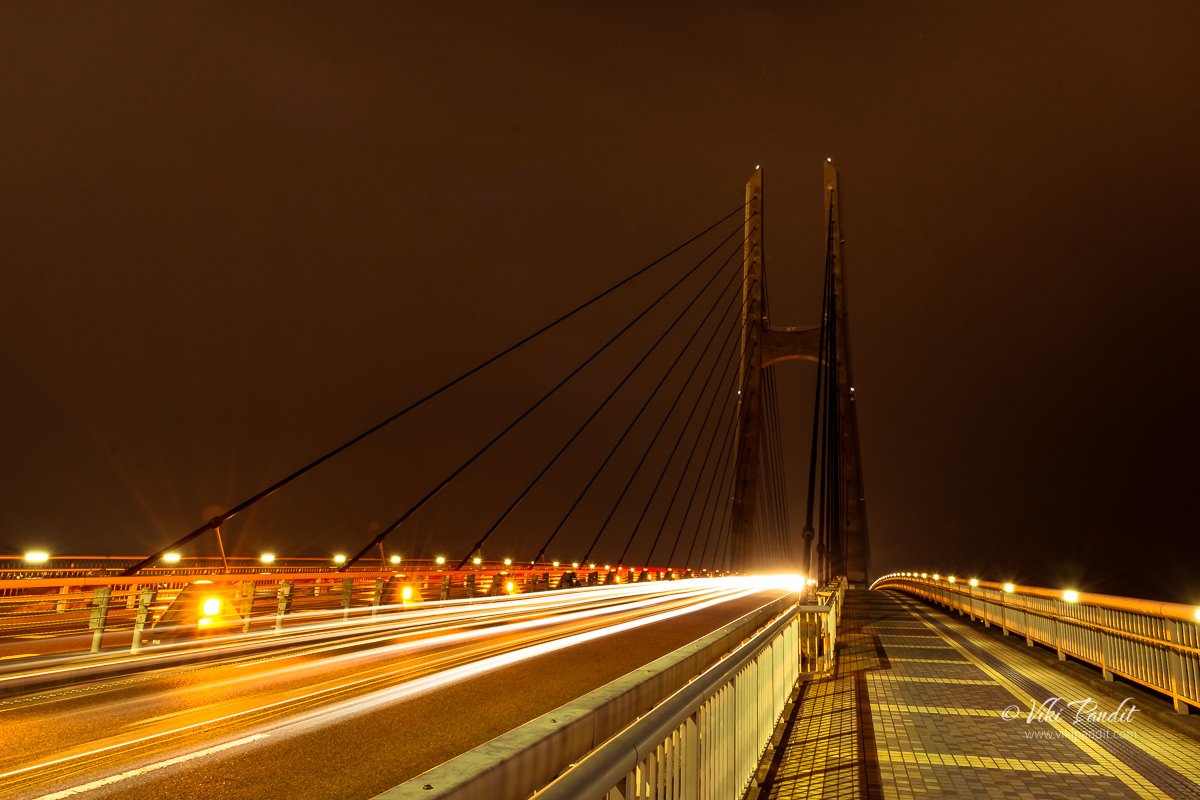
With my tripod in hand we kept walking till we reached a bridge called Tajiri Sky Bridge. It was a cable-stayed bridge with promenades on both sides.

After enjoying some lovely view of the bay from the bridge, we began our walk back too Rinku Town Station.

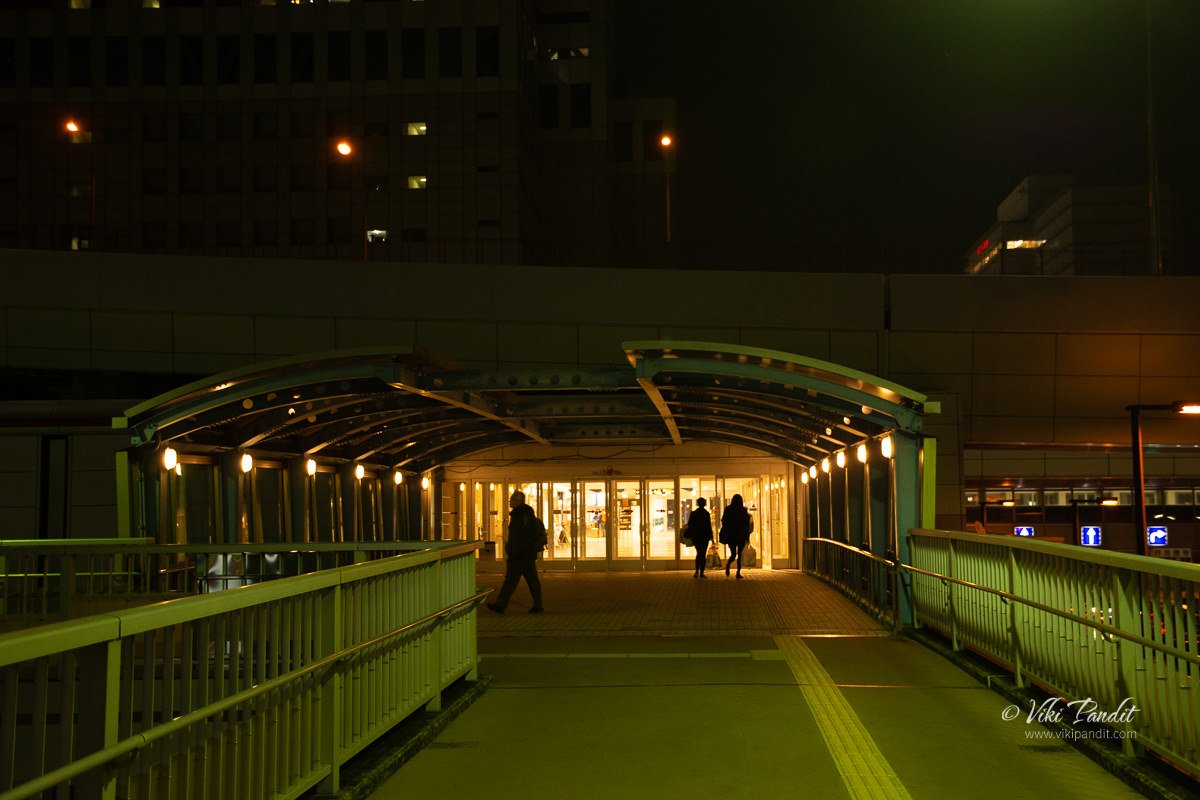
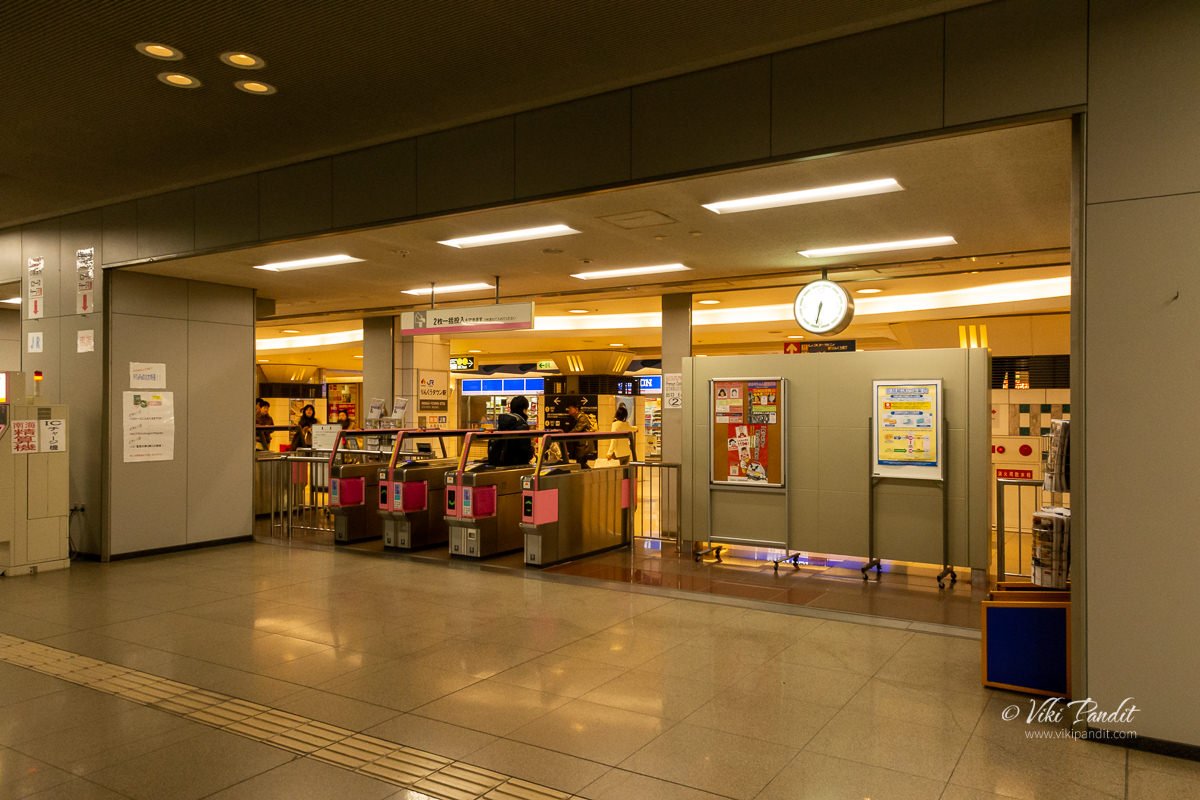
The train station is connected with the mall via a over-bridge, so we passed through the mall. It was late in the evening and the crowds had mostly dispersed by then.

The Ferris Wheel had stopped and was looking glorious at night.

Rinku Town is a lively place to spend an evening. Most of the stores are a bit premium but the mesmerizing landscape around it is free.

Back to Nara

The Airport has an automated ticket counter and the bus stand is right opposite to the ticket counter.

Thanks for reading! I look forward to your comments and questions. If you are looking to explore more of the Osaka region, follow my story as I make friends with the deer at the enigmatic Nara Deer Park in Nara.

Nikon 80-400mm Sample Images

Some of my favorite shots taken using the new Nikon 80-400mm 4.5-5.6 VR on the Nikon D7100. I found the VR to be really helpful while taking handheld, dusk time photos. The lens is a bit on the heavy side and the Rapid Sport strap helped immensely by taking the load off my neck. During the trek to Mullayangiri, I was carrying it all the time and it was tough, specially during the first couple of hours of steep climb.


WD My Cloud 3TB Personal Cloud Storage

You never have enough space if you indulge in photography, more so if you are shooting RAW. Its only been a year or so that I started on this new hobby and it is very much clear to me that the laptop hard disk capacity will not suffice for much longer and I need to set up a Personal Cloud Server for storing my growing catalog of images.

In May last year I had purchased a Seagate Centeral 3TB NAS. It fulfilled most of my needs of backing up my files except that I had to use a third party software like SyncBack for continuously synchronizing the photos on my laptop. Seagate Central does have a native software to do that called Seagate Dashboard, but I didn’t find it very helpful. It used to keep creating new folder names with each sync and used up lot of resources on the laptop making it run slow even with 8 GB of RAM. The problem with using SyncBack is that it doesn’t auto sync my photos. I can add an auto schedule for the backup, but I still feel uncomfortable without a constant mirrored backup. I do own a 1 TB Dropbox account, but I do not intend on wasting my bandwidth on uploading hundreds of files out of which, I am later only going to keep a few.

So when the space on my Seagate Central started to dry up, I decided to try out the WD My Cloud 3 TB unit. Its a touch more expensive compared to Seagate Central in the same capacity. In fact for the same price, I could have gotten a 4 TB unit from Seagate. After using the device for over a month now, overall I am glad I choose to get this rather than another Seagate Central.

Compact Design

The WD My Cloud appears like a white book, the thickness of a Harry Potter novel. It was possibly designed to gel with the array of Macs that are white in color. With my all-black setup, it does appear as an odd one. It is a single volume storage device housing one 3.5-inch hard drive. The device is very compact. Its supposed to be kept vertically but I have kept it lying on the side, since it may tip over with my Labrador dashing around the house on a regular basis. Once you power the device, the front blue LED status lights up. It stays solid when it’s powered up and flashes whenever there is data activity.

Towards the back is a Gigabit Ethernet port, a USB 3.0 port and a power connection port. The USB 3.0 port can be used as a storage extension for backing up data or for creating restore points on an external USB or hard drive. The setup is really easy and you won’t need much help from the setup guide.

Setup WD My Cloud

Once I connected it to the power and hooked it to the  network port of my Netgear router, it appeared immediately on my laptop as WDMYCLOUD in the list of Networks. By default, the NAS comes set up with three public folders called Public, SmartWare and TimeMachineBackup. The Public folder is for storing public data, and the other two are for backups of Windows and Mac machines, respectively.

Connecting the NAS

I didn’t want my stuff to be available on the public folders. So the first thing I did was to download the WD SmartWare. The software was able to easily identify the MyCloud NAS and created all the necessary shortcuts for the Web interface. I created a user account with admin privileges. Once I created my account a private folder was automatically created with the username of the account holder. By default any user folder has public access. One has to restrict access using the Web UI. It should have been the other way round. Once my private folder was created, I set up the software to sync specific folders on my laptop HD. Yes, it allows selective synchronization. Isn’t that amazing!

WD My Cloud Web Interface

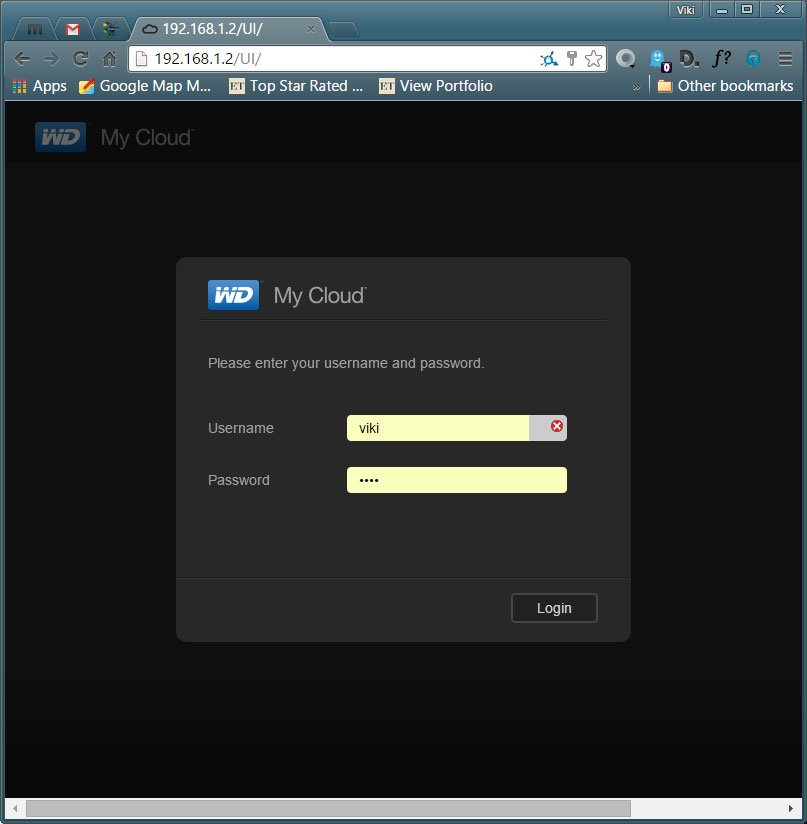
The shortcut for the interface should be on your desktop. If you lose it, it should be a URL like http://192.168.1.x/UI . You can know the IP of the NAS by logging into your router and see its assigned IP. The web interface is well-organized, with six tabs on top for Home, Users, Shares, Cloud Access, Safepoints, and Settings. Most of the tabs are self-explanatory. The Cloud Access tab allows you to sign up for a WDMyCloud.com online account for each user account of the NAS server, and to create an access code for the mobile device app. These are both powerful features.

[su_section]

 [/su_section]

The online account with https://www.wd2go.com/ basically allows a VPN-like connection over the Internet for computer users. For example, if I am traveling I can just point the browser on my Viao to https://www.wd2go.com/ and log in with my WDMyCloud account, and I can create a network drive linked to my folder on the My Cloud NAS server at home provided the NAS is connected to internet at my home.

The access code for mobile devices is pretty useful. I created a user account for my wife on the NAS server, created an access code, and gave her the information. She then downloaded the My Cloud mobile app on her Android and entered the code. Now she is also able to share/store files on the NAS as well. I find it very interesting as I can now create user folders for close friends and family and they can share files with me from any part of the globe on my NAS.

Accessing WD My Cloud via Android

Next I downloaded the My Cloud mobile app on my LG Android, the app easily detected the My Cloud device. If I am on the move, with the https://www.wd2go.com/ account, the mobile app on my device still maintains access to the My Cloud NAS server via the Internet. I currently have WD My Cloud & WD Photos on my Android connected.

WD’s My Cloud mobile app is very similar to Seagate’s Media mobile app for the Seagate Central. With this app, you can access the public share folders as well as the private share folder of the current user. You can quickly download files from the NAS server to the mobile device or back up files, such as photos and videos, from the mobile device onto the NAS server. The WD My Cloud app and the Seagate Central app both are set up on my LG phone running on Android to auto backup my images and videos on the phone to respective devices. However I don’t like it, that they save into a public folder.

WD My Cloud Data Safety

As a single-volume NAS server, the My Cloud has no real-time mechanism guarding it against the failure of the internal hard drive. To make up for this, you can easily back up its contents using the Safepoints feature. This creates a restore point for the server by copying its entire contents onto an external hard drive connected to its USB 3.0 port or to another NAS. When I tried creating a safepoint, it easily recognized the Seagate Central Unit. Once I selected that, it asked for the password to login to that units user account and created a safepoint on that device. Isnt that fabulous. If  something goes wrong with the WD My Cloud, I can restore the NAS. When or if you choose to do this make sure that the second unit has equal or more capacity as the WD My Cloud NAS.

Pros

  • I get a ton of capacity for all my photographs. You can choose from 2 TB, 3 TB & the latest 4 TB
  • Anywhere access. Even If I am not at my home, I can still access the files via the internet.
  • Automatically backup my smartphone, tablet and computer files, unattended.
  • With My Cloud, I never have to pay fees to access my own content except when I am connected via the internet (internet charges will apply). Dropbox costs me around INR 6000 every year.
  • My content is stored safely at home, under my roof, where it belongs.
  • My Cloud is on my own network, so backing up is much faster and cheaper. I backed up 500 GB of data in a couple of days over a wired connection. The same on a service like Dropbox would have taken a week and cost me 500 GB of bandwidth. Yikes!

Cons

  • The device needs a docking station that provides a more stable base. In its current shape, I am always afraid its going to fall sideways.
  • Needs to go Black. Most devices are black today. Form UPS to routers to mouse to keyboard. White looks off. Maybe fine in a Mac configuration.
  • The file transfer speeds are still slow over wireless but a bit of improvement over wired connections. Wirelessly I never get more than 5-6 Mbps file transfer. Over wired it goes up to around 60Mbps but this can go up further depending on how fat your router is.
  • Every time a user account is created, the new folder created is publicly available to all users connected. It shouldn’t be so. The folders should be initially private and could be configured for access/restriction through the web interface.
  • The problem with Smart mirroring software from WD is that it isn’t that smart. When I delete files from my photography collection, they stay on WD My Cloud. So basically I can’t use that folder in case my laptop crashes.
  • If you are the finicky type, the shiny white surface scratches very easily. Just placed on the desk my device has already gathered quite a few scratches on the sides and it doesn’t look pretty. The webbed covering of Seagate Central still looks brand new after 6 months.

Recommendation

In the My Cloud, WD has combined data sharing, media streaming, backups, and a powerful personal cloud in a single compact box. If you are looking for just a storage solution with ability to stream content, I feel Seagate Central would be a better choice since for the same price you get 1 TB more space. If however you are looking for a good backup option you should go for WD My Cloud.

Photo Walk in Lodi Gardens

I was in Delhi during this weekend accompanying Mani. She was taking an exam at the Jawaharlal Nehru University (JNU). This was my first visit to the Indian capital and couple of my colleagues who live in Delhi had suggested me that I visit the Lodi Gardens & Haz Khas Village as they were very near to JNU. Both the places have a historical significance and I am always game to see such places that hide so many stories. So for the few hours I had while Mani was taking the exam, I decided to visit the Lodi Gardens for a photo walk.

Reaching Lodi Gardens was easy. I took an auto ride from the JNU to Lodi Gardens. It hardly takes around 20 minutes for the ride. The Lodi Gardens is spread over 90 acres and contains the tombs of two prominent Afghan rulers, Mohammed Shah & Sikander Lodi, who ruled parts of northern India and Punjab between 1451 to 1526. As I entered the garden, I could see the towering Bada Gumbad. It was around 9 a.m and quite a few fitness enthusiasts were still on their rounds.

Bada Gumbad

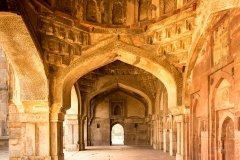
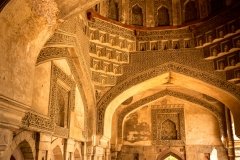
The Bada Gumbad is characterized by an octagonal chamber, with stone pillars and intricate Arabic inscriptions on the walls. It harbors the the tomb of Mohammed Shah. The structure is characteristic of Islamic architecture with a high dome resting on a square base. The base pillars are constructed of stones very much like the temples of Hampi. The dome shows signs of weathering that has happened over the years, but the lotus on the top is till well-preserved. On the sides are two long corridors. The corridor on the right is more artistically designed with domes and wall carvings.

Sheesh Gumbad

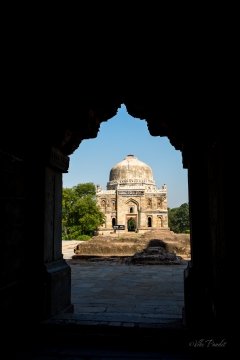
Just opposite of Bada Gumbad is the Sheesh Gumbad. Its as though both face each other. The Sheesh Gumbad also follows the pattern of Bada Gumbad with a double storeyed appearance. One cannot miss the adorned vivid blue tiles towards the top. The use of the glossy blue tiles adds to the grandeur of the structure, outshining even the bigger Bada Gumbad. The ceiling is decorated with plaster depicting floral designs. The inside is pretty dark. There are several unmarked and un-ornamented graves in rows along the rough floor. The walls are unadorned more by bluntly scratched names of stupid people rather than the exquisite plaster that once was the talking point of the tomb. The dome’s concave surface is decorated with floral and Arabic calligraphy patterns.

Another tomb within the gardens is that of Sikander Lodi, which is similar to Mohammed Shah’s tomb, though without the chhatris. It was built by his son Ibrahim Lodi in 1517, the last of Sultan of Delhi from Lodi dynasty. Ibrahim Lodi was defeated by Babar in the first battle of Panipat in 1526, signifying the end of the Lodi dynasty and laying the foundation of the great Mughal Empire. Sikander Lodi was a poet of the Persian language and prepared a diwan of 9000 verses.  The top two storeys of the Qutub Minar were reconstructed in marble by Sikander Lodi. Time passes quickly in such historical surroundings. It was 10:30 already so I had to head back to the University without seeing his tomb.

After picking up Mani, we had a quick lunch in a nearby mall. I was extremely impressed with Lodi Gardens and wanted Mani to have the experience as well. So we went back together.

We sat on the soft green grass beside the Sheesh Gumbad. Towards the late afternoon, as the sun became softer, a number of birds descended upon the area. Parrots, Mynas, Pigeons & Eagles were swooping out of nowhere over the park raising the sound decibels of the quite surroundings. A number of joggers also started to flow in. Some people were walking their dogs. It is heartening to find dogs are allowed in this park. Among all the dogs out for walk, Labradors were clearly a favorite.

We stayed there till sundown. There was a quick passing shower. We took shelter in one of the chajjas inside the Bada Gumbad. Once the rains stopped, we headed back to the airport.

The beautifully landscaped and manicured garden along with the magnificent tombs creates a charming atmosphere. The park provides a quite get away from the noisy life in the middle of Delhi. For those willing to listen, the walls of the tombs, they tell stories most interesting. I loved the time I spent there and I have my wonderful friends to thank for suggesting this lovely place.

[su_tabs]
[su_tab title=”Faqs”] [su_accordion]
[su_spoiler title=”Lodi Gardens timings?”] Open on all days. 6 am to 8 p.m[/su_spoiler]
[su_spoiler title=”Is there any entrance fees?”] Enternce to Lodi gardens is free. There are no camera charges either[/su_spoiler]
[su_spoiler title=”How much time does it take to tour Lodi Gardens?”] For a good exploration it will take around 2 hours. If you love greenery, one might forget counting time here [/su_spoiler]
[/su_accordion][/su_tab]

[su_tab title=”Other places to see near Lodi gardens”]

[su_list icon=”icon: chevron-right”]

  • India Gate
  • Haz Khas
  • Qutub Minar

[/su_list]
[/su_tab]
[/su_tabs]

 Photo Gallery

Flipside Sport 20L AW

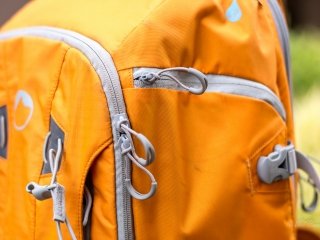
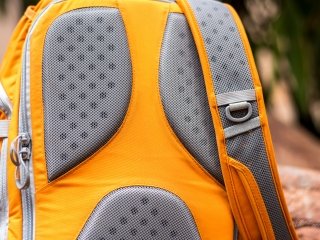
I have been using the Flipside Sport 20L AW for the past few months now and its a good time to list the pros and cons of this camera bag from LowerPro.  I have to credit my bro for getting me this from the States since at that time this bag was not available in India. *It still isn’t at the time of writing this review. So how did I find the ultimate camera back-pack, read on…

In my search for the right bag, spanning almost a year, I came across various different types and brands of sling bags and backpacks. The available ones were either too small or had very less pockets to fit everything or in most cases were bulky like a suitcase. If something eventually fit my space needs then I would be disappointed with the material quality and the dull black color. I wanted something that provided ample space but was also smart and cool.

How to choose your Camera Bag

Naturally what worked for me may not work for you. It totally depends on the gear one wants to be carrying to the field at one go. It would be helpful if I list the gear I typically carry with me on a trek or travel.

  • Nikon D7100 with attached 80-400mm f/4.5-5.6
  • A Polariser and a few ND Filters
  • A Speed Flash
  • Nikkor 35mm f/1.8G Prime Lens
  • Nikkor 10-24mm Lens
  • Spare Battery, some extra SD cards and other accessories
  • Tripod
  • 2 liter hydration reservoir

In spite of going over and over various brands, I didn’t get what I was really looking for. In my searches, I did like the Tilopa BC from F-Stop but they were very expensive and a touch larger than I would be comfortable carrying on day treks. The bag I wished for was something in which I could carry my DSLR camera, a couple of lenses and a remote flash along with a few small accessories. It shouldn’t look overpowering when lets say, I was on the street or in a garden, shooting.

Eventually one day in the course of researching in November 2014, I chanced upon a YouTube video featuring the release of this new LowerPro camera bag at some exhibition. It was love at first sight as this bag ticked all my requirements. I had been following the Flipside Sport 15L AW. It was my best option up-till that point. The only reason I didn’t get that one is the lack of pockets for small accessories. I loved the Orange variant, there is another available in Blue. I immediately asked my brother to get the new Flipside Sport 20L AW from Amazon US. He was going to come to Kolkata for a visit during the fall and he brought it along in December.

I had to however wait for another couple of months to get my hands on it. The wait was killing. Eventually one of his friends brought it back with him to Bangalore. Having it in my hand was a cloud-nine experience. The color was beautiful and the texture was pleasantly smooth, unlike any bags I have felt before. The first thing I did once I got back home was to re-do the compartments inside so all my stuff fit snugly inside.

The Flipside Sport 20L AW is a on-the-go access camera day-pack that easily fit all my pro-sumer gear. I would say it’s essentially built for photographers in pursuit of active adventures like treks or hiking. It might feel a bit bulky for street photography.

Lowepro’s Flipside backpacks are unique in that the main compartment opens from the back. The body-side access design offers quick access to gear when the backpack can be rotated to front. So, whenever I need to change a lens, I just swing the pack around on one shoulder, unzip the compartment and viola!

Apart from the ease of lens changing, the back opening also saves my stuff from being thieved in a busy bus ride or on the streets since my camera compartment cannot be accessed while I am wearing it.

The inside of the Flipside Sport 20L AW contains a removable, adjustable camera compartment with a storm-flap closure that provides customizable space for my gear. I can easily change the layout of the compartments to suit what I am carrying for that particular trek. It also offers water-resistant protection. The camera compartment can also be totally removed and the bag used just as a regular day-pack.

The perforated, breathable padding in the shoulder straps with air channels offers cozy comfort to my back and shoulders. The pack also has one large, flat, interior pocket, suitable for a note pad or thin accessories. I generally store my ND filters here. With strong padding, it offers good protection to the glass filters.

The latest LowerPro bags have been using a unique tripod holder system on the side. I find it extremely helpful while trekking since it holds it securely and stops it from bouncing around. The hydration-ready pocket offers easy-access to a 1.5 liter hydration reservoir although I have been able to fit in a 2 liter bag. The front of the pack has trekking pole attachments points.

The built-in waterproof rain-cover in a hidden bottom pocket protects gear from rain, snow, dust and sand. I applaud the move towards lightweight, resilient and high-performance fabrics constructed of 210D triple-ripstop nylon with PU coating. It does away with a good amount of weight previous generation hiking and camera packs used to have. The PU coating also adds durability to the fabric.

Pros of the Flipside Sport 20L AW :

  • It’s Orange. Love the color!
  • It looks cool, not bulky like I’m wearing a suitcase on my back
  • Tripod carrier on the side.
  • Unique access to my gear. I no longer need to take my backpack off to get to my stuff. I just remove the shoulder straps, leaving the waist belt on and spin the pack around so it’s in front of me, then I unzip the back panel, exposing all my stuff. Because I change my lens inside the bag, the insides of the camera also gets less exposed to dust.
  • The hydration pack takes a whole less space than a similar volume bottle
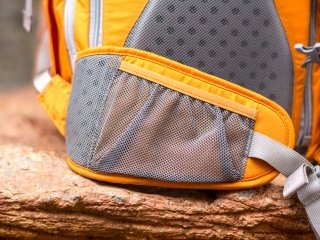
  • Strong shoulder straps, chest strap and hip stabilizers.
  • Lots of nice little pockets in the front & nooks on the straps
  • Two separate rain covers, one for the entire bag, one more to cover the storage compartment
  • I like that you can remove the whole camera storage assembly and use the backpack as a regular day pack if you want.

Cons of the Flipside Sport 20L AW:

  • For one, I miss some more space to throw in a second set of clothes when I am on a 2-3 day mini treks. I think I will get the Tilopa BC from F-Stop for that

Conclusion

Overall its a good bag and I see it becoming one of the popular bags among adventure photographers. The price is similar to other bags in the same volume range so some bags might become obsolete like the Lowepro LP36423PWW Flipside Sport 10L Backpack. The price might be a factor in the Indian market. I assume it will sell for around ₹ 12-15k. Since I got it from US, it cost me only ₹ 6k. Sometimes I do wonder why we third world countries actually end up paying much more for stuff than the first-worlders.
My Flipside Sport 20L AW has been a constant companion through thick and thin. I leave you with some places it has been..

Mullayanagiri Trek and Ridge Walk

In my search for peace in the wilderness, I was finally able to force some time out from my work schedule, to go on the trek to Mullayanagiri, the highest peak in Karnataka. I had been planning this trek for some time. In fact, I was all set for this trek in November 2014 but had to cancel it at the last minute. 

Mullayanagiri is located in Chikmagalur, Karnataka, some 280 km away from Bangalore. With the Bhadra Wildlife Sanctuary only 15 km away, the area is rich in vegetation and varied wildlife.

We started from Bangalore late in the night at around 11 p.m. The travel time to Mullayanagiri is around 4 hours. At the base of Mullayanagiri, there is a wildlife outpost. It was early dawn and since the wild animals use the area as a thoroughfare, we had to stop there for over an hour. A handful of us strolled around for the time the bus waited. It was still dark. The guards at the check-post had lit a bonfire, that kept us warm for some time. By 6.00 am, one of the dhaba (eatery) had opened up. I and a couple of the trekkers took an early breakfast of coffee and omelets.

Once the checkpost opened, we drove up the hilly area. The vibrant sun rose from behind the strips of the cloud. That sunrise is still etched in my mind as the sky soon became a painter’s canvas.

By 8 a.m. we were at our homestay. It was a nice, quaint place in the woods. I could hear the sound of water cascading from a tiny spring nearby. From our cottage, I could see a few exotic birds. I went for a walk taking pictures of some birds. I now understand 400 mm is still way short for birding. Maybe I should invest in a teleconverter.

The Trek to Mullayanagiri Peak

After a quick freshening up and breakfast of Idli, we started on our trek to the Mullayanagiri peak.

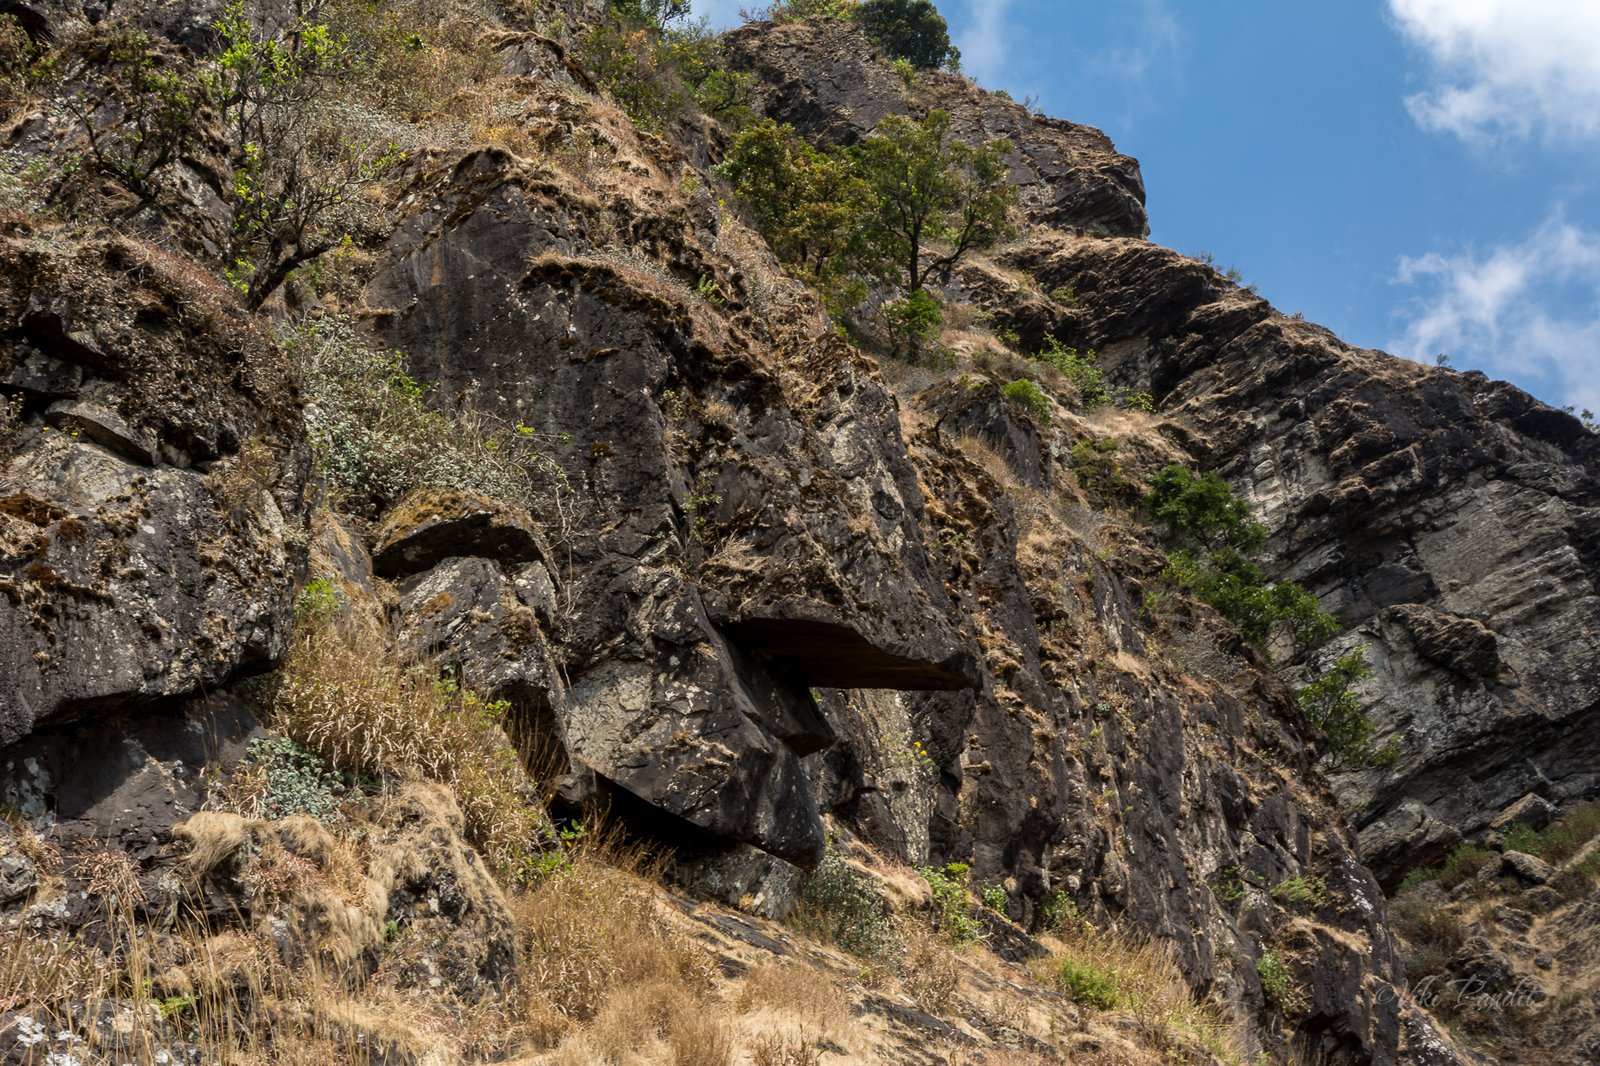
The bus drove us to the starting point of the trek. We started the ascent at around 10 a.m. A few minutes into the trek one of the guys, Ravi started feeling sick. We waited for some time but eventually, when he did not recover, we had to send him back to the cottage with one of our trek guides. The climb is steep and it was tough with my camera backpack. After climbing for about a couple of hours, we passed a big rock that looked totally like a human face.

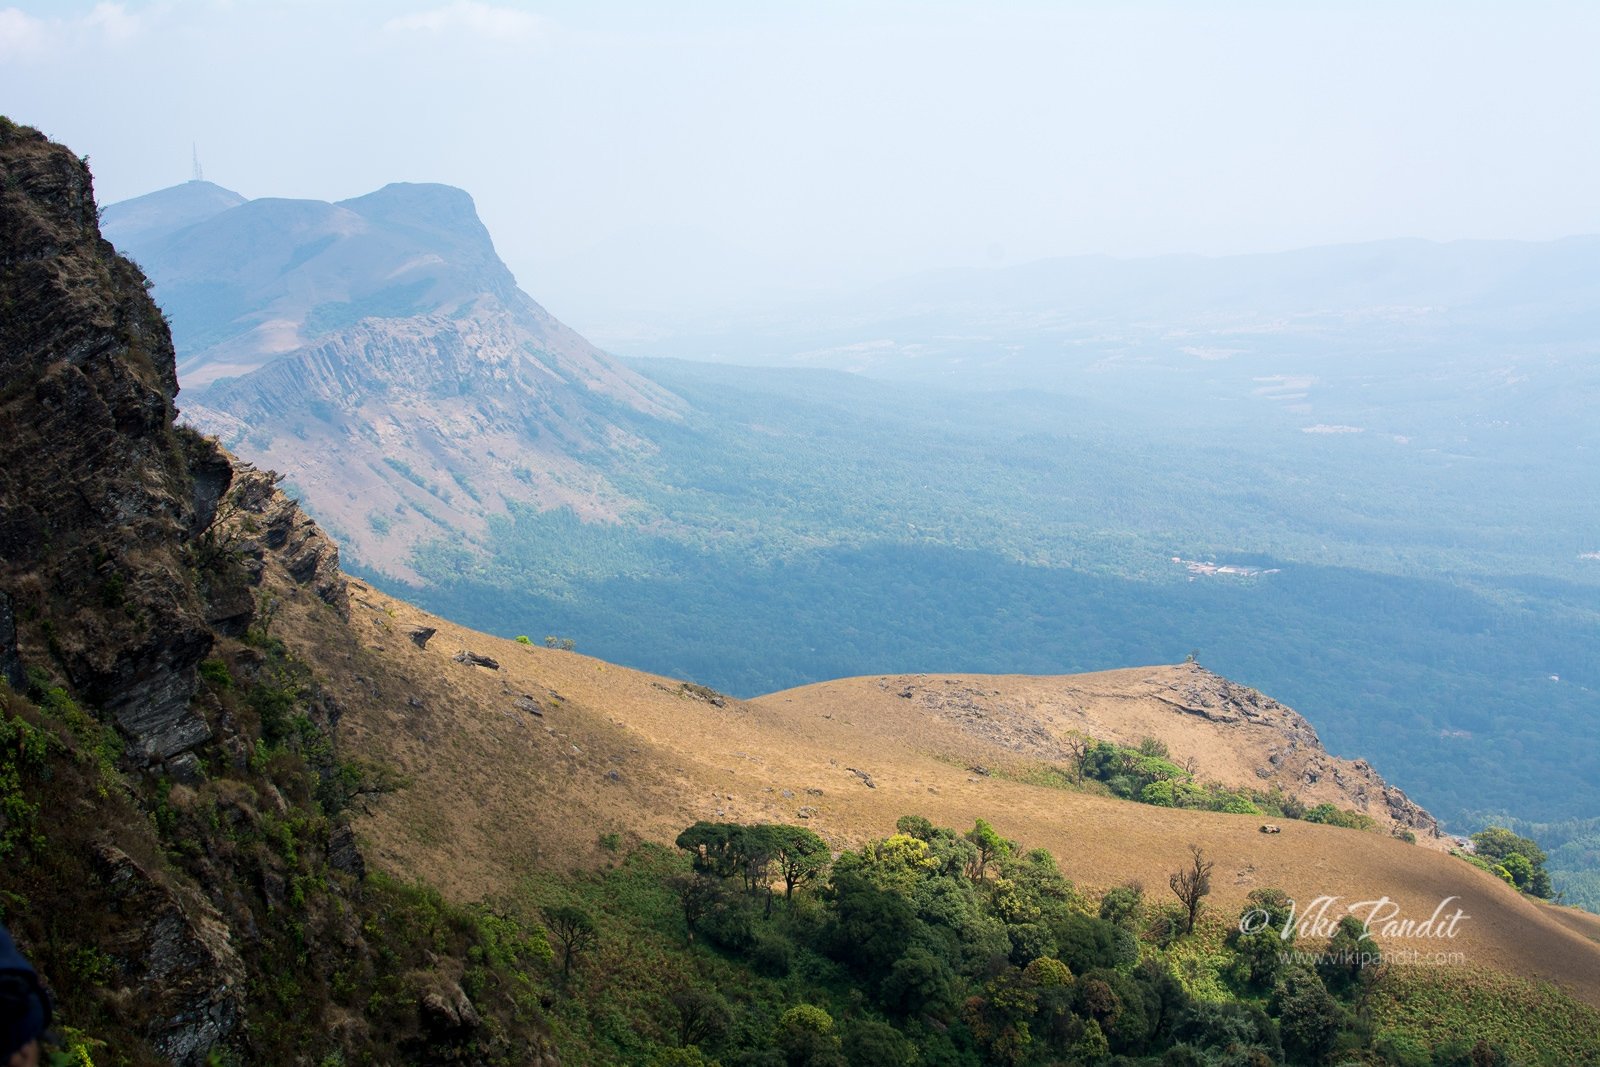
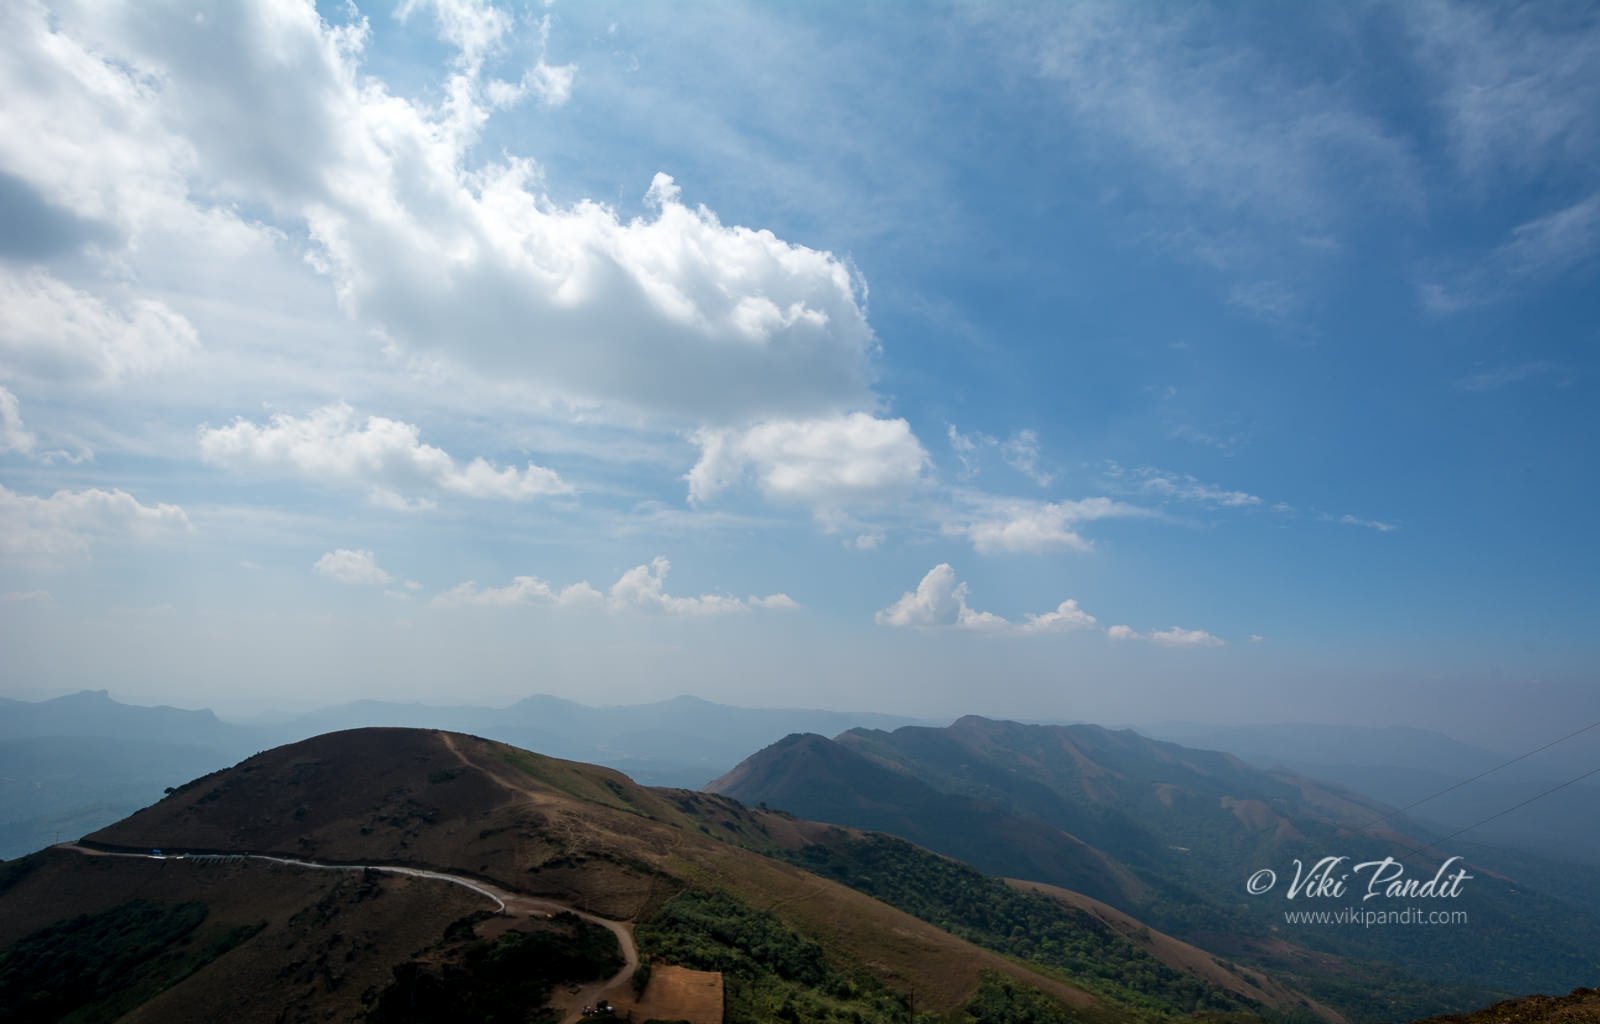
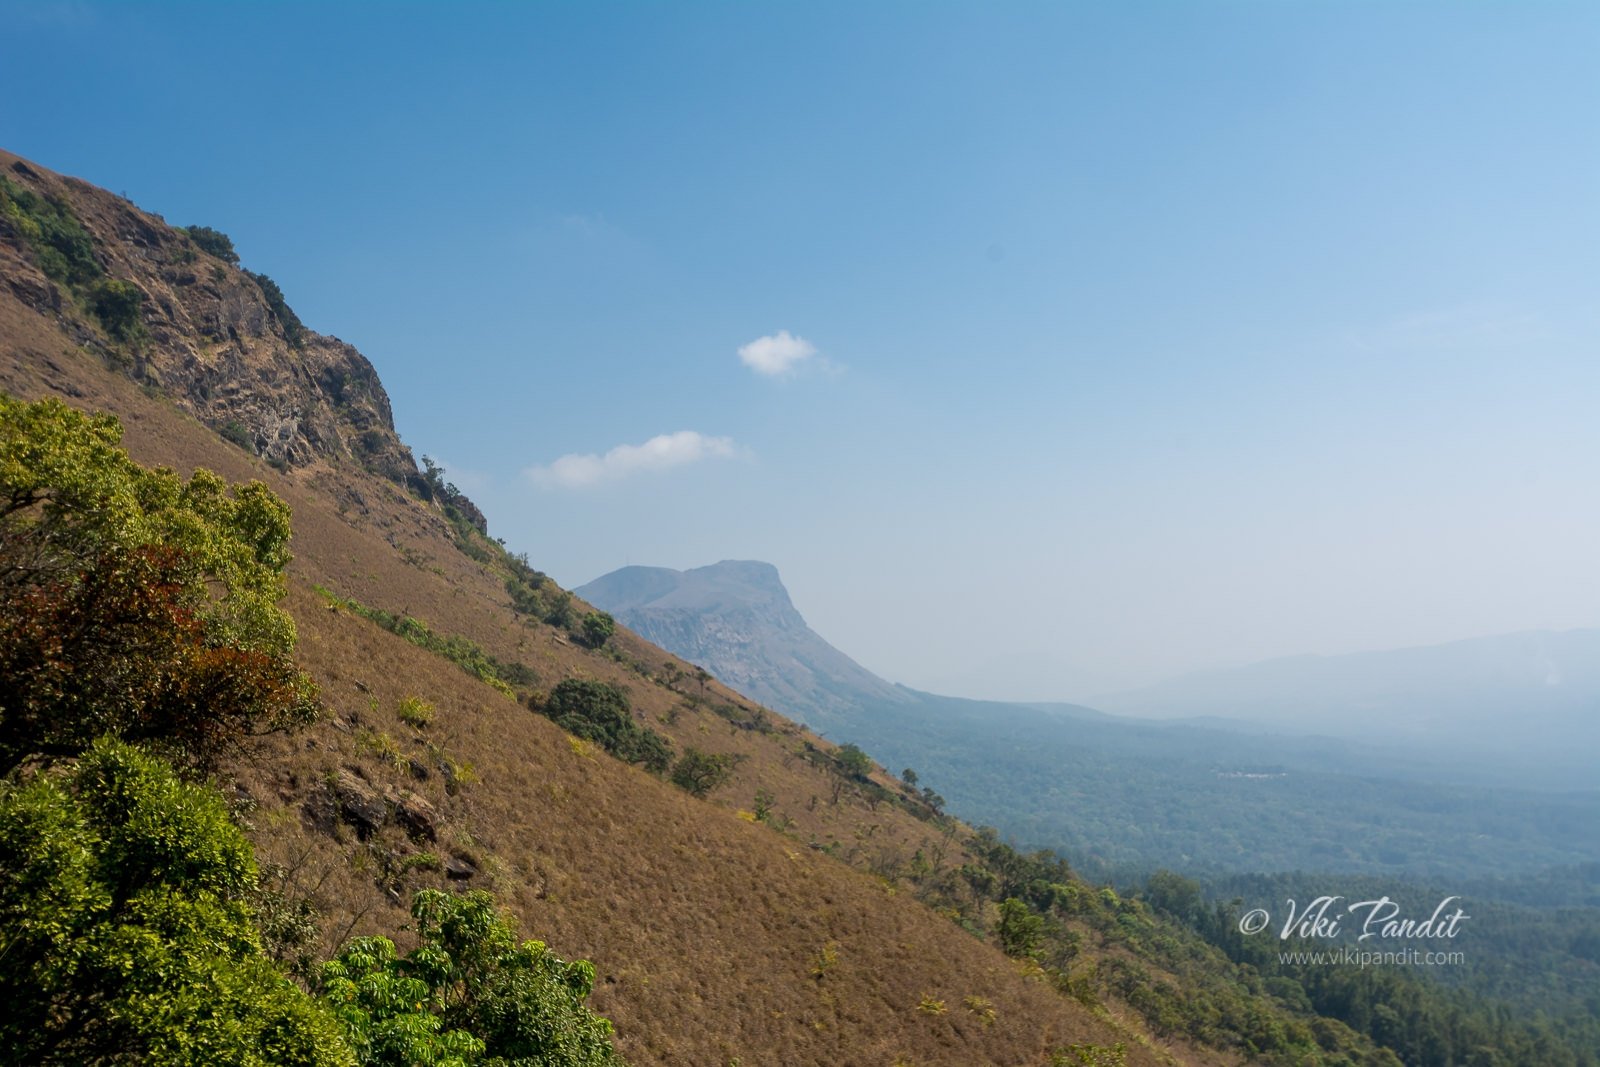
After the first hour of climb, the trek becomes relatively easier as we move into the flatter area. At the top, the hills are smooth like meadows. I must say these meadows would look amazing after monsoons when green grass would cover the whole mountain like a carpet.

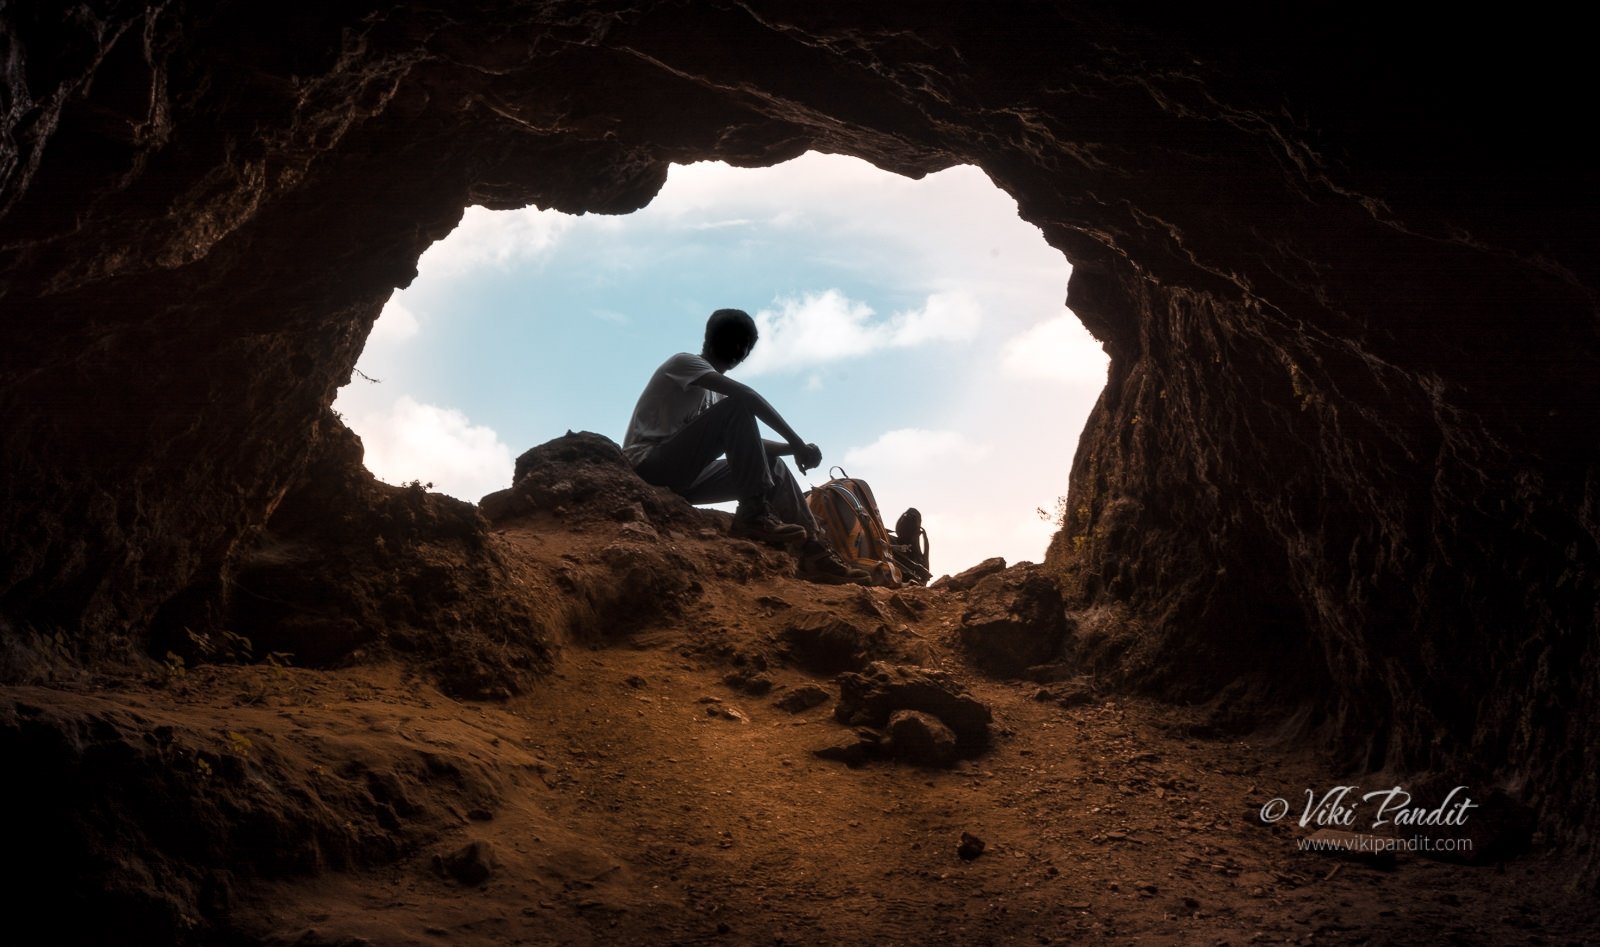
After hiking through the meadows we reached a cave. I had developed some cramps in my right thigh so I took some rest here. Hydrating oneself is very important on a trek. Not only on the trek, one should hydrate the body a couple of days before the trek.

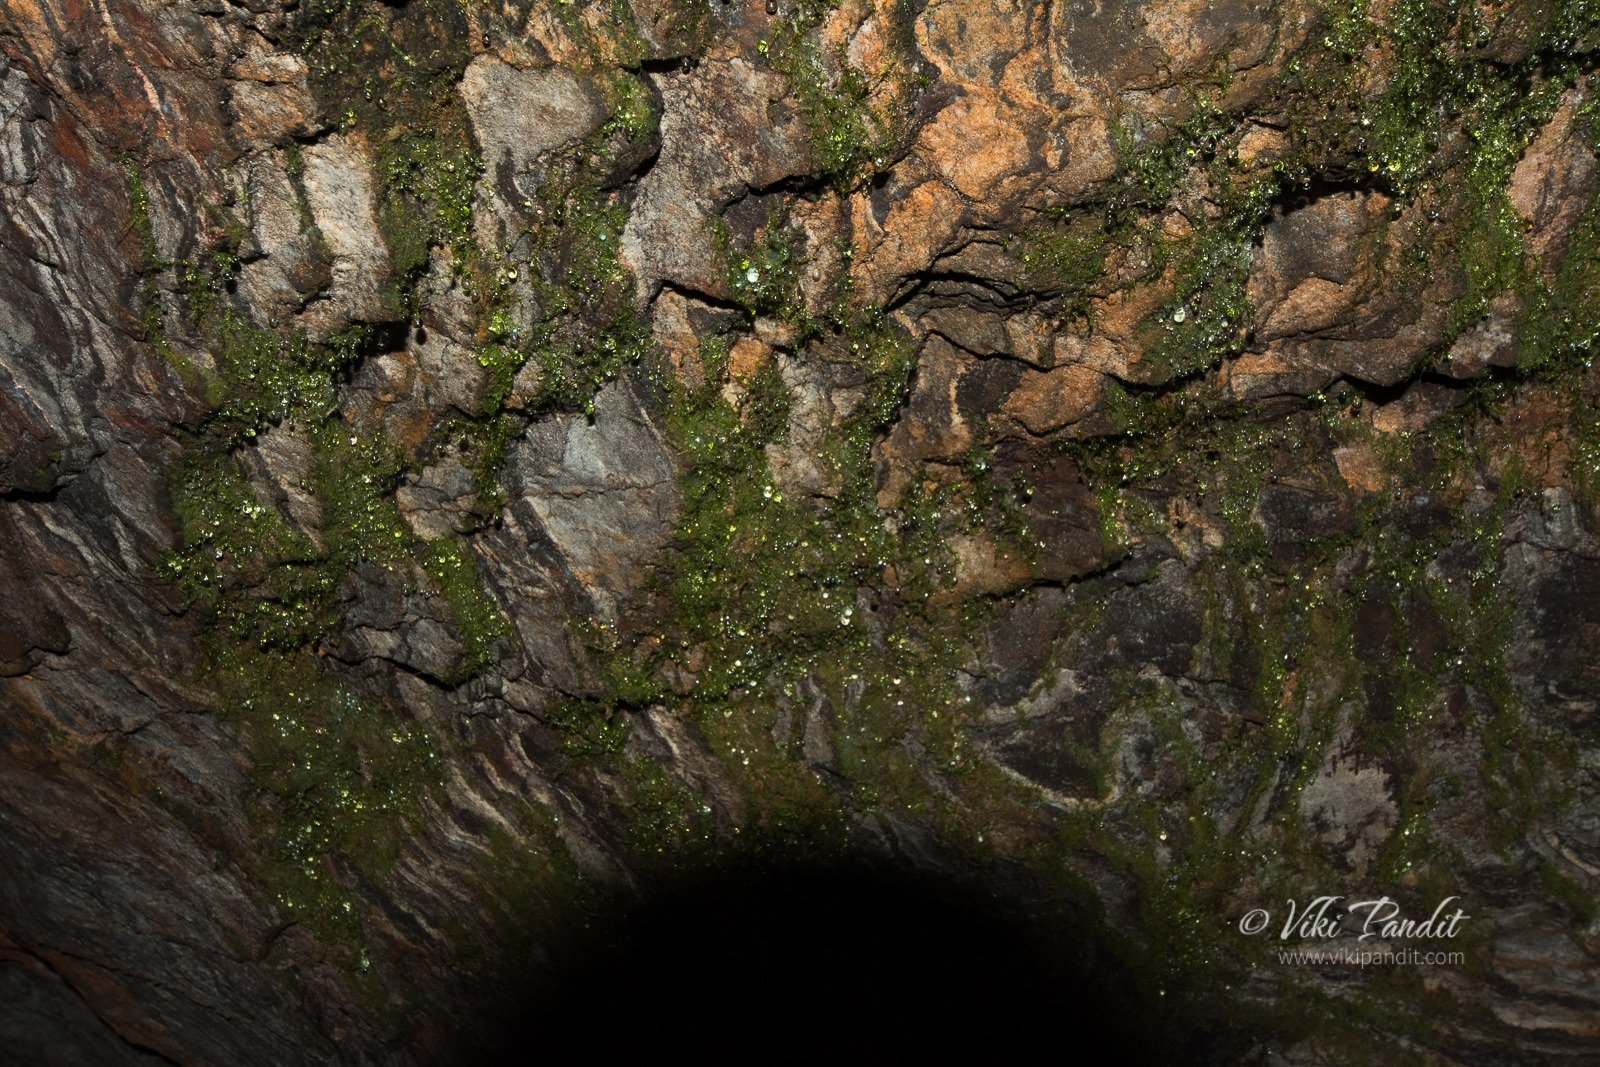
There was a lot of moss on the walls of the cave. At places where the rocks were visible, one could make out the lines dripping water had created.

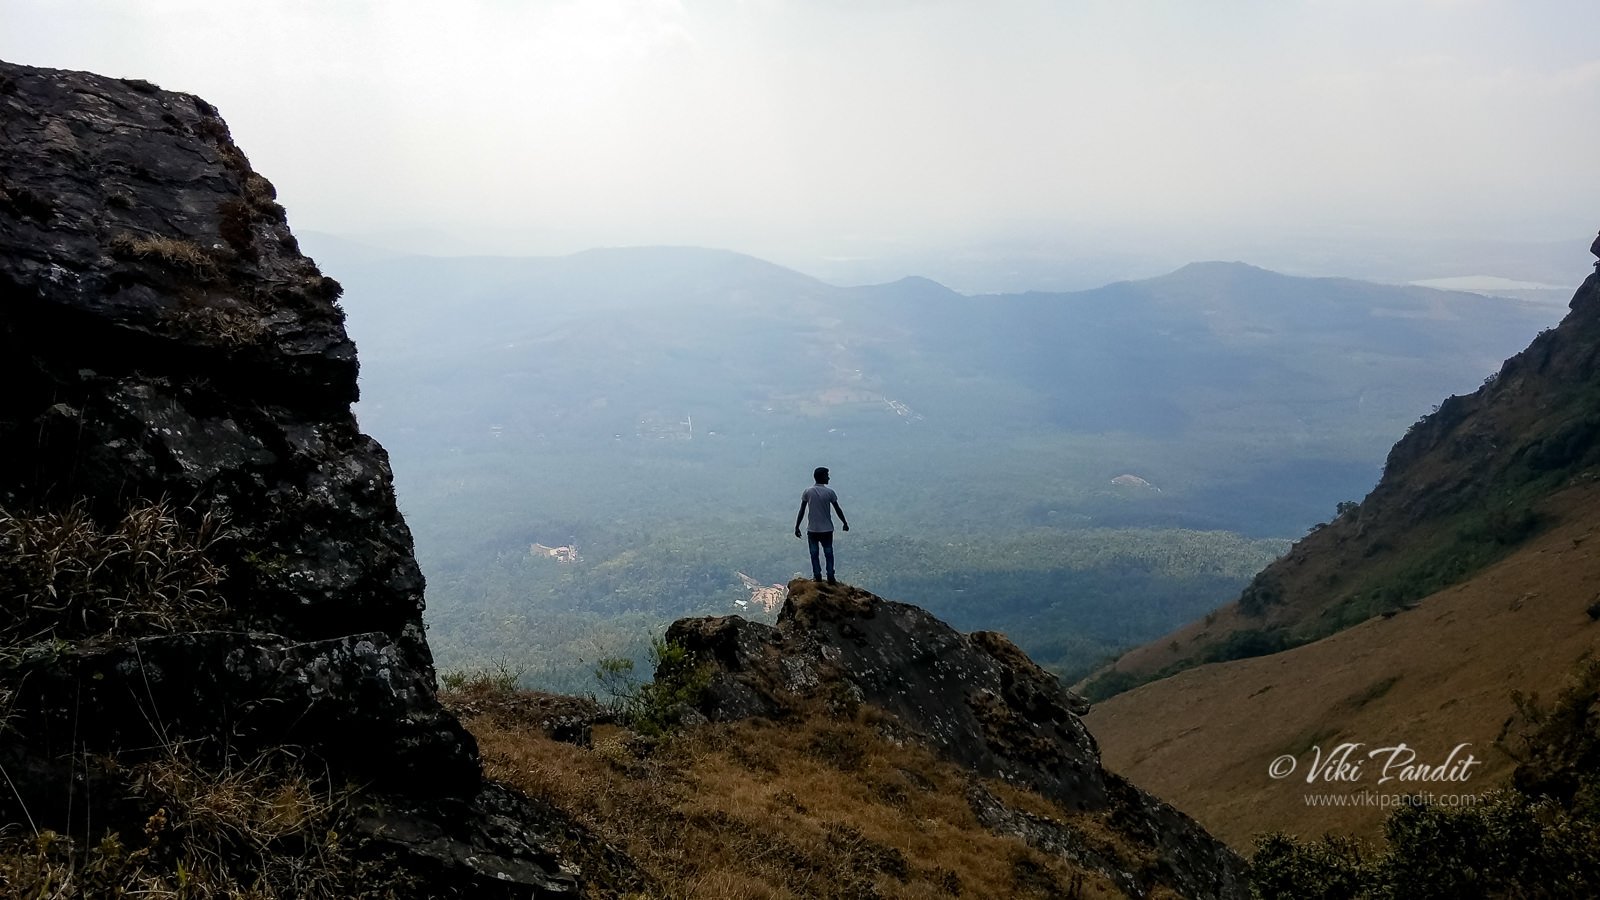
From the cave, after a bit of hiking, we finally reached the peak.  Mullayanagiri is part of the Baba Budangiri Hill Ranges and it’s amazing to look at from the peak. I found myself in front of a small temple dedicated to Lord Shiva on top of the hill. The small hillock inside the temple premises is the highest point in Karnataka. The front was still clean, but it was very dirty and smelly overall. We went a few steps down where it was comparatively cleaner and decided to have lunch there. 

After lunch, we got back on the trail. The descent from here was relatively easy. 

The trail becomes a bit steep as we neared the end of our hike. The bus was already waiting for us at the base. We hopped in and on popular demand from the group, headed towards the Dabdabbe waterfalls. I decided to wait for the bus, opting to save my energy for the next day. 

Bonfire

Back at the cottage, we freshened up. Some guys started a game of cards. I went for a walk down the road. it was pitch black just a few meters beyond the cottage. I gathered some courage and kept going for about half a kilometer, eventually, I turned back. I wasn’t able to make a call through my phone. The person who owns/runs the place lent me his phone. He is a nice chap. Talks very humbly. I am going to put his phone number in the FAQs below if anyone needs to contact him for homestay.

Dinner was served at 9 p.m. We had rice and sambar. After dinner, we gathered some wood from the surroundings and started a bonfire starting at around 11 p.m. An alien theory was proposed by one of the trekkers, Altanai, who refuses to acknowledge the theory of Evolution. Our discussion gradually moved on from fantasy to more acceptable on philosophical lines. Eventually, I went to sleep at around 1 am.

I rose up early, washed up, brushed, and went for a walk towards the bushes, where I had spotted some Bulbuls the day before. I waited for a long time patiently eventually a few of them showed up. I was able to get a few shots. 

Mullayanagiri Ridge Walk

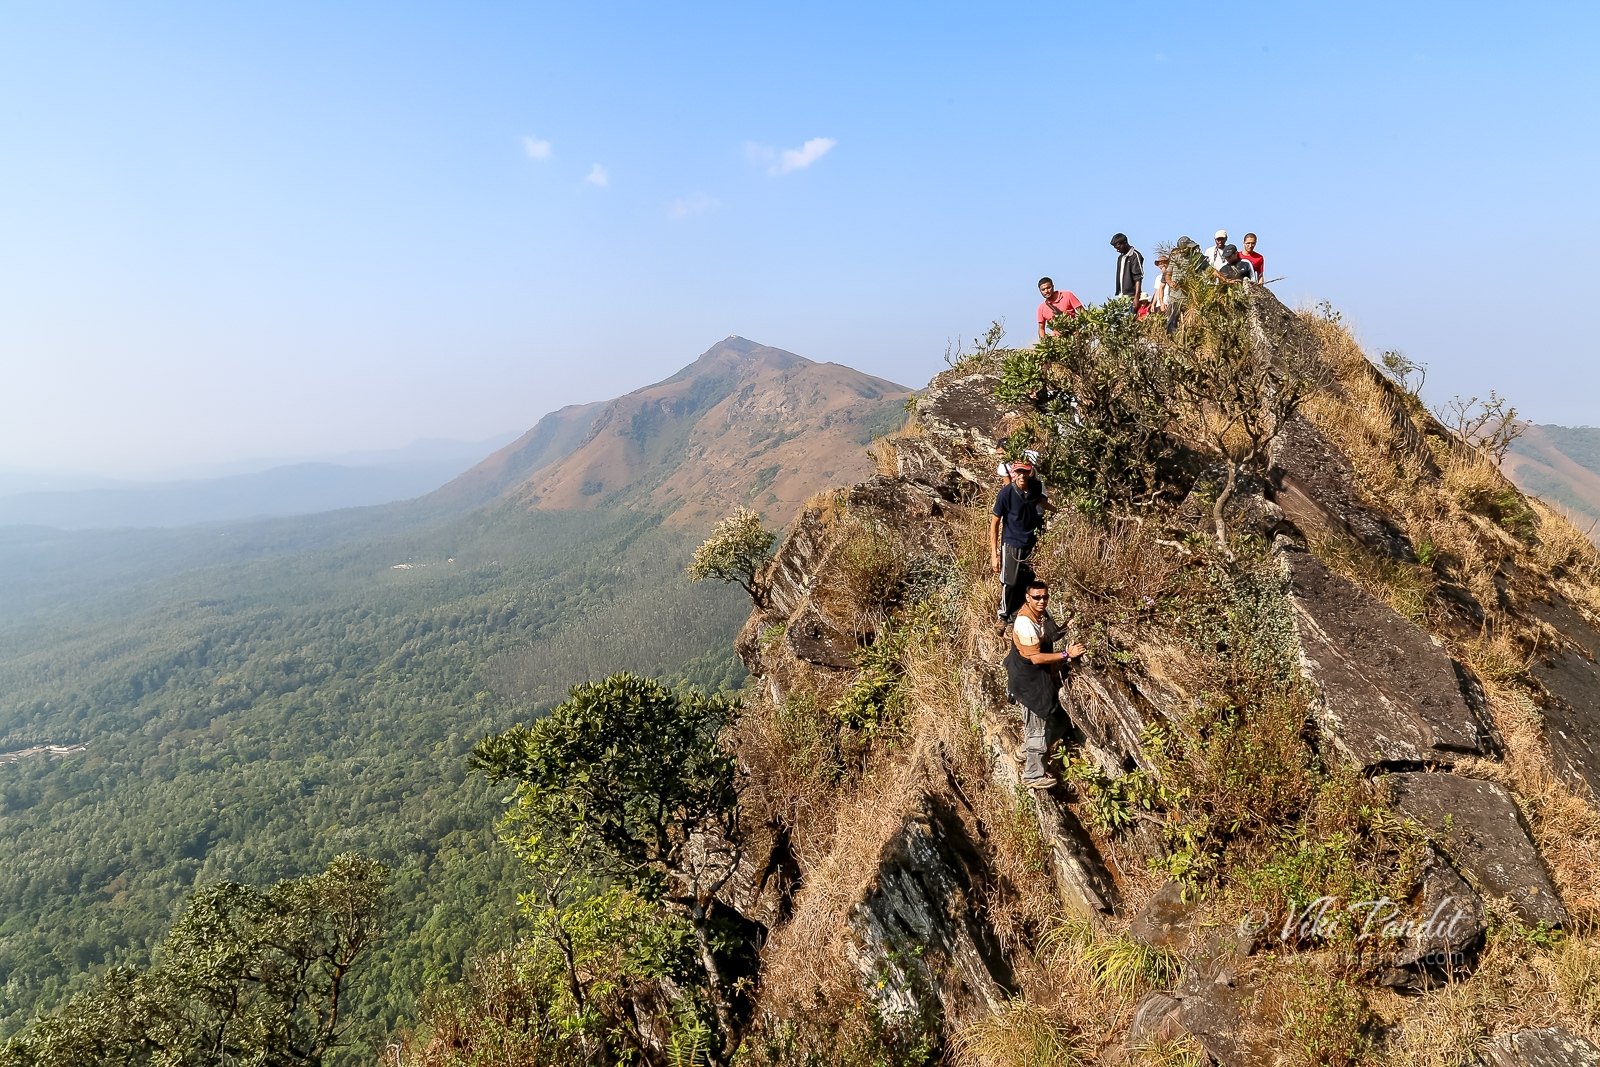
I had noticed the Ridge, the day before and it looked overwhelming, so I decided to leave my camera gear behind and concentrate on the climb instead. The ridge walk is not allowed without permission. It’s a steep climb over edgy rocks but not difficult. At certain points, it’s steep and very narrow, but the rocks make it easy to grab and climb. Without the heavy Camera bag, I was feeling a lot free. For the first time, I was leading the trek.

The rocky climb lasted for about an hour, thereafter we hit the meadows again.

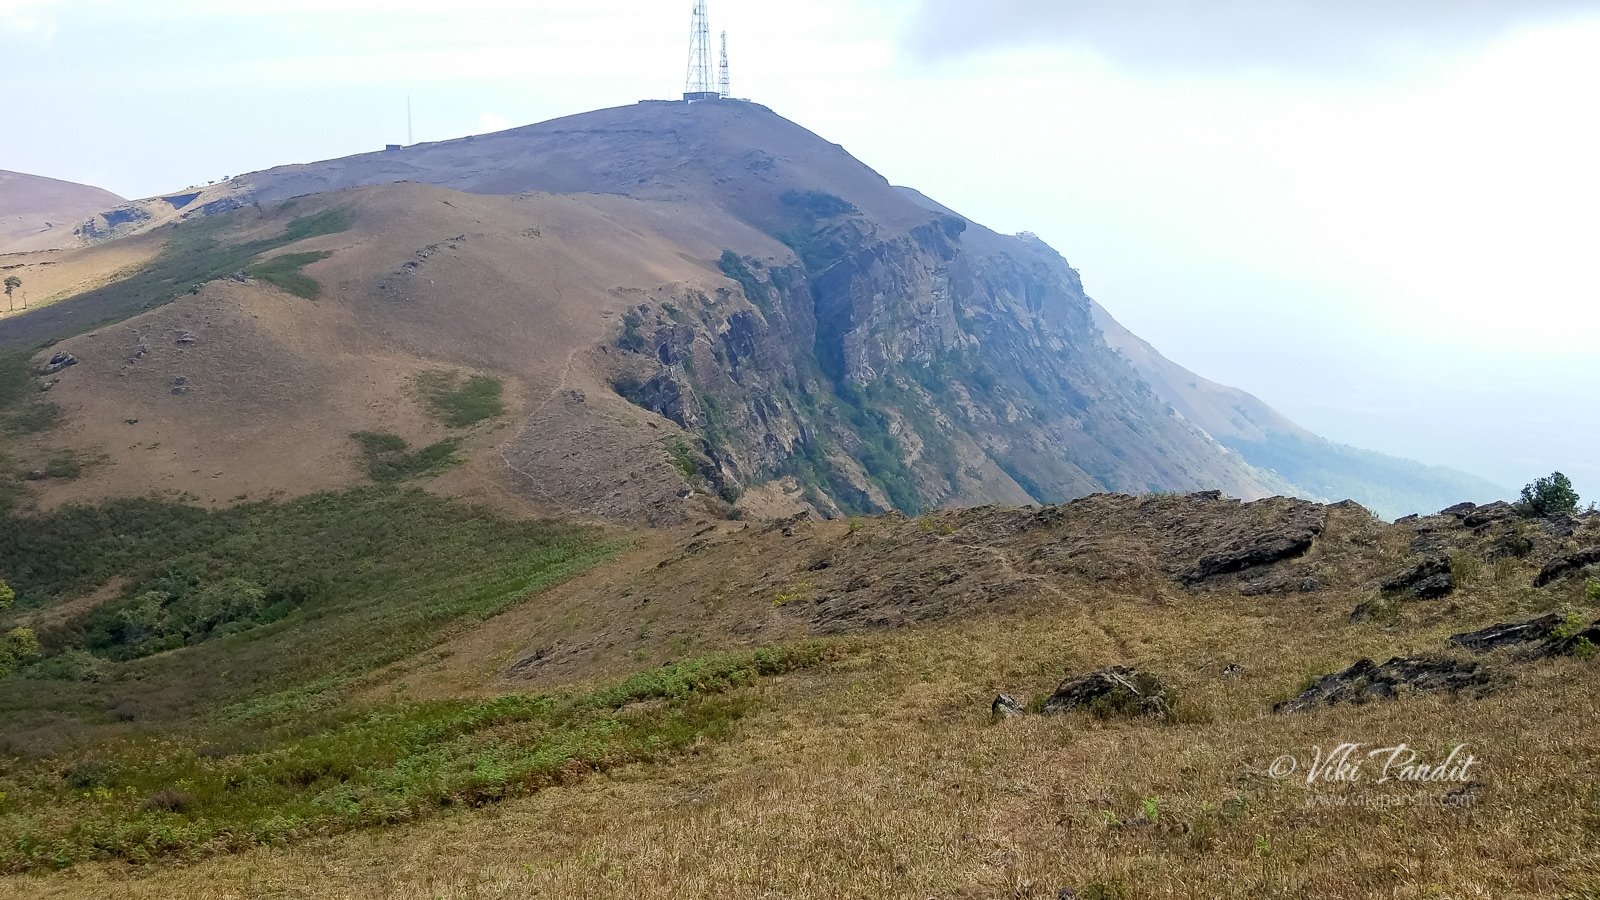
After a couple of hours, we could see the BSNL tower. From there we walked along a steep ridge. It was dangerous and thrilling at the same time. Looking on the right towards the abyss made my head go round. So I just kept my head down and eyes on the trail and kept walking.

It would have been safer to use trekking poles in such unsafe areas. One slip can turn out to be fatal. We reached the end of our walk at around noon. We went back to the cottage to have lunch there. On reaching, I went and collected my camera backpack. After a hearty lunch, we headed back to Bangalore.

On the last couple of treks, I felt the focus of the treks had shifted to making noise, jumping around, and taking “flying photos” to obtain likes on social media. It certainly depends on the group of people going on each time. I had really enjoyed the earlier treks I went to last year. Even the group that went to Gokarna was fun. At one point on the trek, some of us had to wait for an hour while others in the group went for a photo session. Not everyone enjoys nature in the same way. I am strongly feeling the need to go solo if I want to truly enjoy nature in peace.

Drive to Bangalore

On the way, we stopped at Chikmagalur for some refreshments. I was feeling dehydrated so I grabbed a Pepsi. From my window seat, I kept watching the fields passing by. I love to stare at nature, it pleases me, like an ecstasy drug. We reached Silk Board stop at 9 pm and in another 30 minutes, I was back at home.

Mullayanagiri is not for the faint-hearted, especially the ridge walk. The trek to the peak is easy to moderate difficulty. I would suggest keeping yourself as light as possible. It was a mistake on my part to take extra lenses on the trek and it weighed heavily on my first day of the ascent. The meadows are excellent especially when you go on the ridge walk, however, note ridge walk is quite a bit on the dangerous side and should not be challenged in the monsoon season. 

Do you have the homestay details?

Eco Holiday Home. The homestay is located on Baba Budangiri Hills. They provide rooms, tents as well as the Cottage where I stayed. The name of the contact person is Aman. His contact number is +91 9481 365 565
Disclaimer: I loved the homestay. The bathrooms were clean and the food was tasty, but I do not accept any responsibility if you use their services.

Are there other any interesting places around Mullayanagiri?

If you are visiting Mullayanagiri, you could also plan a visit to the Bhadra Wildlife Sanctuary. It is only 15 km away

What is the best time for trekking to Mullayanagiri?

Mullayanagiri is pleasant after the monsoons. The lush green meadows are a sight to behold. Although trekking during that time has its disadvantages. Leeches are everywhere. The mist decreases visibility substantially

Gokarna Beach Trek

[su_progress_bar style=”thin” percent=”30″ text=”Difficulty Level – Easy” bar_color=”#ed97db” fill_color=”#cb0e6b” text_color=”#000000″]

This weekend I head out on a trek on the rocky cliffs along the coastline of Gokarna.

Gokarna is located along the Arabian Sea at the ear-shaped confluence of two rivers, the Gangavali and Aghanashini, around 580 km from Bangalore. Four of the most gorgeous beaches are located to the south of Gokarna. Our trek route was to start from the southern-most Paradise Beach and hike our way northwards towards Half Moon Beach, Om Beach, Kuddle Beach and finally end at Gokarna Beach.

Gokarna means Cow’s ear. There is an interesting piece of story behind how this place got this name. Legend has it that after a vigorous penance by Ravana, Shiva was pleased and offered three boons to him. For one of his wishes, Ravana asked for the Atma-Linga. Shiva took out the Atma-Linga from his own heart and gave it to Ravana with strict instructions that it should not be placed on ground until it was reached its final destination.

The Devas, fearing that Ravana would become all-powerful asked for help from Vishnu to somehow stop him. On the way, carrying the Atma-Linga towards Lanka, Ganesha met him in the garb of a cowherd. Vishnu and Ganesh played a trick on him and saw to that he kept the Linga on the Ground. When Ravana tried to pull it out, the shape of the Linga took a form of the Cow’s ears.

Gokarna is also an important center of Sanskrit learning. The early settlements of this region can be traced back to the Brahmins. It is also the residence of Bhandikeri Math and Togu Math where Sanskrit knowledge has been passed down from generations in Brahmin families.

Ride from Bangalore

My scheduled pick-up was at 7 p.m at Silk Board. Due to heavy Bangalore traffic I was delayed and finally made it at 7.45 p.m. I joined Ishan, Preethi, Srinivasan and Pradyumna at the Silk Board bus stop. Unfortunately Ishan wasn’t going on this trek and Salwat was already out there in Gokarna, so Preethi was our trek lead for the trip. Once there, I got to know that our pick-up Tempo was even more delayed. We introduced ourselves as we waited for the bus to arrive. It finally reached us at around 8:30 p.m.

After picking up the rest, we finally started for Gokarna at around 9:30 p.m. Along the way we stopped at a dhaba for dinner. I had a plate of Idli, the safest food around these parts. For the rest of the journey, I didn’t get much sleep on the bus. At around 8 a.m. in the morning, we stopped at an eatery at Shivamogga for breakfast. The Idli was warm and tasty. It also felt good to stretch the legs. After around an hour we passed through the Shettihalli Wildlife Sanctuary. I was lucky to spot a few peacocks along the way. As we neared the coast, the jackets were off as it grew more and more warmer.

Gokarna

It was noon by the time we reached our destination. The sun was beating down upon us. Salwat, sweating profusely, was waiting for us at the bus depot on Temple Road. We walked towards our home stay which by the way was not very far from the bus stop. At first impression, Gokarna might strike as a laid back town, growing up, trying to find its place in the modern world, but in all actuality it is really old, with a history that stretches back to a mention in the Bhagwad Gita.

For most of the time, it has been a village of fishermen and farmers with the only attraction being a temple, believed to contain Atma-Linga, the soul of Shiva. But Karnataka has entered a period of rapid change in tourism, and Gokarna is being dragged along with it.

Paradise Beach

After quickly freshening up and donning our beachwear’s, we drove by bus to a spot near the Paradise Beach Huts. From here we started the trek along the Paradise Beach trail towards Paradise Beach. The walk took us through a bushy forest along an elevated path. After walking for 15 minutes we started to descend. While going down we were presented with the stunning view of the beach. Cameras were out in a flash and why not. It is a paradise for beach lovers.

We climbed down the rocky hill towards the inviting beach. On the left I noticed a hippie trying to cook up a meal. By the looks of it, it was apparent he had been squatting there for days. The beach is in the shape of a small bay, curved inwards. Once on level land, the guys just ran off, flinging their stuff in the sand and tore towards the big waves.

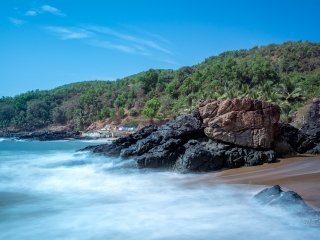
Salwat informed us not go above waist level in the water. Well, he quickly had to change his advice as the incoming waves were already chest high. I found a secluded spot and took a few long exposure photographs of the beach. Unlike some other beaches I have been, here the rocks are sharp and I got a few bruises on my palms while climbing to finding a good spot.

We stayed at the Paradise Beach for over an hour. Once everyone had their fill of the waves, we started hiking towards the Half Moon Beach.

Half-Moon Beach

The trail to Half Moon Beach is a bit tricky with lots or rocks. On the way we passed Hells Cliff. Well not many can claim to be in “Paradise” and “Hell” on the same day 😉 On Hell’s Beach, there is a small rock. Some of the guys took up the climbing challenge.

Past the rocky terrain we reached a cluster of shacks. It was 4.30 p.m. and we were hungry as hell. We decided to have our lunch in one of the 3 eateries. I was surprised to see Israeli specialties on the menu. Not a die-hard fan of experimentation, I still went ahead and ordered the “Laffa” along with 3 of my friends. The food took time coming but it was tasty. It was like a huge Egg Roll with salads and boiled eggs. I was full just with that. They also have hammocks around which give a hippy feel to the area. I saw very few Indians on both Paradise and Half Moon Beach. They appear to attract mainly foreigners.

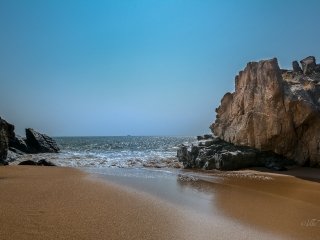
After relaxing for some time, we moved on to the Half Moon Beach. The harsh sun had given way to some nice pleasant breeze as we entered Half Moon Beach. The beach was devoid of tourists and I got some lovely photos in the golden hour. We didn’t spend much time here as we wanted to witness the sunset from a good vantage point.

Om Beach

We all were very excited at the prospect of viewing the sunset and we hurried along towards the Rock of Peace. “Rock of Peace” is a huge cliff towering over the side of Om Beach which extends deep into the Ocean. The view from here is fantastic. Om Beach is named so because it is shaped like the auspicious ॐ [Om] symbol. One can easily make out the Om sign from this cliff. The stage was set, but without any clouds the drama was missing. Some hippies had gathered here with drums. The slow beating of drums added to the serene moment.


It was difficult to move away even after the sun had set, but Salwat wanted us to reach the beach before dark, since the trail led through a forested area and it would become more and more difficult to find the trail in the darkness. So we got up and were on our way to the Om Beach. Down at the beach, light was fading fast. I wanted to get a good shot of the Parvati Rocks but it wasn’t to be. Om Beach is beautiful beach that seems to go on forever, surrounded by palm trees.  I have to come here again, to get a shot of the setting sun with the Parvati rocks in the foreground. I believe it will look gorgeous.

I lay on the beach staring at the stars for a long time, alone. I have started to understand that I do not share the same enjoyment from nature as others. Chattering disturbs me. I would just like to be a rock and stare at the wonder of nature.

Kuddle Beach Trek

After some relaxation on the Om Beach we headed out to Kuddle Beach around dinner time. I wasn’t too pleased as we arrived at the Kuddle Beach. Its dirty, full of restaurants and cafe’s. Cows are moving around. Litter is everywhere. Overcrowding, construction of lodges and other activities has definitely had an impact on this beach. There are also some lodges with rooms for as little as ₹1500. Salwat recommended the Kuddle Palace restaurant for dinner. In the restaurant, the guy taking our order appeared to be a Nepali. On asking, he confessed to coming here during season time to work for 4 months. Once the season ends, he heads back to his homeland in Sikkim.

Inside the restaurant, we were like this huge gang. All the tables in the restaurant were moved and joined together to form one big table. It was like a feast from one of those Asterix comics. I was missing the tasty Tibetan dishes I had in Sikkim, so I ordered a Thupka. After dinner I took a walk along the beach, below the stars. Some couples were also wandering along the beach. I was missing Mani, so I called her up. We talked for a long time. Relatively a long time for us would be 6 hours, but this time it was 40 mins. Eventually once everyone was done, we cleared the bill and walked towards the Gokarna Beach.

Gokarna Beach Trek

At the end of the Kuddle Beach, we had to climb up a row of stairs to head towards the Gokarna Beach. After the stairs, we reached an open field. Thankfully there were white markers guiding us along the trail or we would easily have gotten lost. On the way we gathered some dry branches and grass for the bonfire. At the end of the field we passed a Shiva Temple. It was a moonless night and we could barely make it out in the pitch darkness. Right after the temple a series of steps brought us to the edge of the Gokarna Beach.
Gokarna Beach was way cleaner than Kuddle Beach. No shacks or lodgings.  Boats were lined on the coast, belonging to fishermen who now probably earn more ferrying passengers along the coast. The beach was full of crabs. In every direction I could see holes create by crabs. We had a quick bonfire and then headed back to home stay. On the way back some of us we were already discussing to come back in the morning for sunrise.

We reached the home-stay at around 12:30 a.m. I activated the alarm for 4:30 a.m. and went to sleep straight-away at 1 o’clock.

Sunrise on the Gokarna Beach

I got up before the alarm could wake me up. I would like to believe I posses a biological clock that wakes me when I am truly serious about it. Even in Sikkim, I was up daily at around 4 a.m daily. In contrast, in Bangalore, I am rarely up before 10 a.m 😉 It was a pleasant surprise to find almost everyone already up and ready for the sunrise trek at 4:30 a.m. Salwat was tired and so we, in all 13 of us including me, headed out ourselves. The roads were lit but the beach area was pitch dark. We went following the same path we had come down the night before. The bonfire we had lit last night was totally doused by the waves. I was surprised that the tides had come all the way up to this point during the night. We hiked towards the Shiva Temple and took a detour from there towards the peak of that hill.

The Sun rose from behind the bushy forest at around 6:30. We took some clicks and then walked back towards the beach.

As we walked back towards our home-stay in proper daylight for the first time, I could see the endless blue sea with coconut and palm trees lining the beach. Already many had gathered to take a dip in the sea before going into the temple. I understand, Gokarna Beach is frequented more by Indian pilgrims than the random tourist. We walked across the quaint little town, through the streets lined with temples, eateries and traditional tile-roofed brick houses. The presence of beaches and temples together create a contrasting town. On one side we see the over-eager pilgrims and on the other we see the laid back hippies.

Ride Back to Bangalore

After a quick breakfast at Pai’s Restaurant we were on our way back to Bangalore. Deepali, whose hometown is not very far from here treated us to a sweet milk beverage. The day was hot. On the bus, I took a small nap since I had barely slept the last two days. On the way back Salwat offered a stop at the Jog Falls as a bonus. The waterfall was a whimper from what I had seen in the pictures. One should see this place roar in the monsoons. While admiring the falls I was lucky to spot a beautiful rainbow forming at the base of the falls. We also took our lunch there in a nearby restaurant. The menu was limited nor was the food any good.

Rest of the way I choose to sit upfront beside the driver, just looking at the road and the trees go by. Pradyumna was also there with his Kindle, reading. We talked a lot about the places he wants to visit. I gave him a few tips on Hampi. He is a silent type of guy. We stopped at an eatery around 4 in the evening. They had something new, I have never had before, Pepper fries. I also had a cup of coffee before getting back on the bus. Bangalore was still 120 km away. Since it was getting dark, I went back to my seat at the back. The guys started a game of antarakshi. It was fun and kept us entertained all the way to Bangalore.

It was midnight by the time we reached Bangalore. One of the guys Abhishek, shared a cab with me as his place was along the way. I was back in the cozy comfort of my home in half an hour. It is one of my fetishes, every place I visit, I need to get one amazing shot, that summarizes the place. Unfortunately I didn’t get one this time and this is going to haunt me until I go back again and get it.

[su_tabs]
[su_tab title=”Faqs”] [su_accordion]
[su_spoiler title=”Best place to stay in Gokarna”] Hotel Gokarna International (0832-257843 / 08386-256622/ 848) is one of the better lodges on the Kuddle Beach. Note there is another Hotel with same name in the town, so double-check[/su_spoiler]
[su_spoiler title=”Good restaurants in Gokarna?”] Kuddle Palace has good multi-cuisine food and also very cheap. On the Half Moon Beach you can find some shacks. The food is all right, but it takes a long time coming.[/su_spoiler]
[/su_accordion][/su_tab]

[su_tab title=”Places to see in Gokarna”] Along with the amazing beaches, Gokarna is also famous historically.

  1. Visit the Adi Gokarna & Aatma Linga Mahabaleshwara Temple.
  2. Hike to Yana natural rock formations, a couple of hours away
  3. Jogg Falls is 2 hours drive from Gokarna
  4. Dandeli Wildlife Sanctuary is a 6 hour drive from Gokarna. Tours are available through the reserve where you can, if you are lucky, check out the Black Panther, Bison & Iguanas.

[/su_tabs]